Runbooks
With Runbook Manager you can easily work with Runbooks directly from ServiceNow. All code will be saved on your Azure Automation Account and expected input parameters etc. in ServiceNow will be automatically kept up to date.
You can also work with Runbooks using the Azure Portal or an editor like Visual Studio Code. If you do so, make sure that you run the scheduled import to inform ServiceNow of any changes to the edited Runbooks.
Create a Runbook
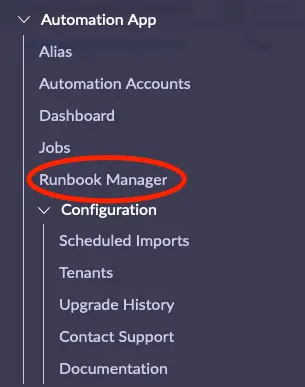
To create a new Runbook open “Runbook Manager”. Notice that Runbook Manager will open in a new tab or window.
Ensure that you have selected the correct Automation Account for your Runbook. Then click the “Create new” button in the lower left corner.
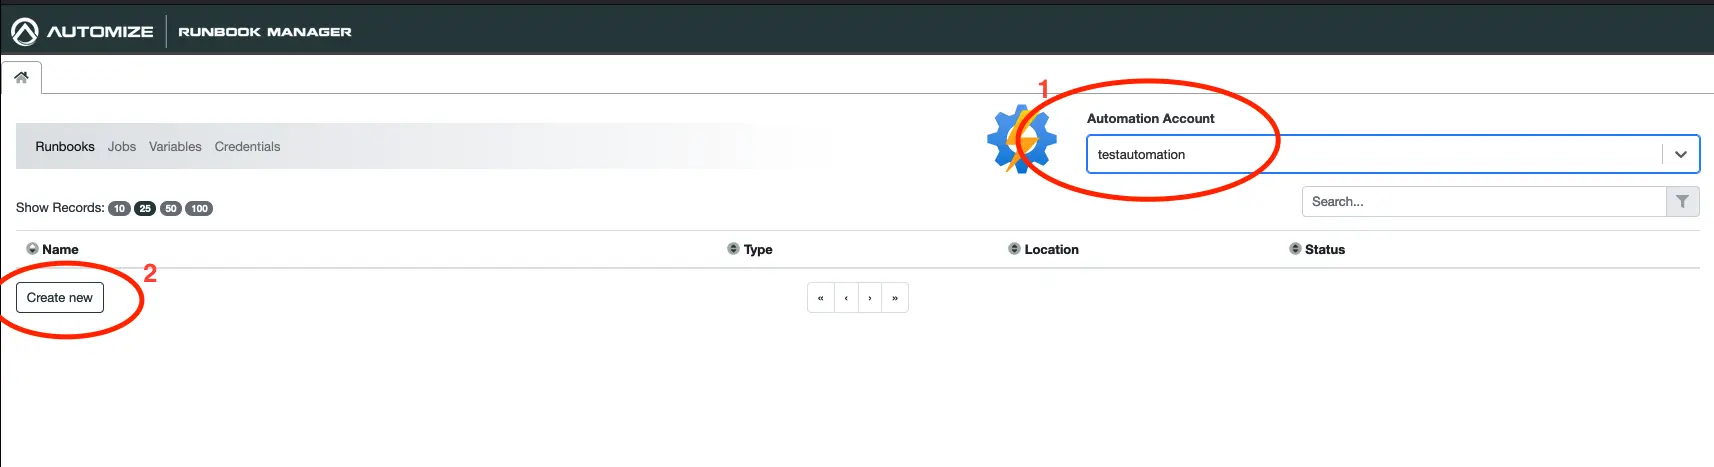
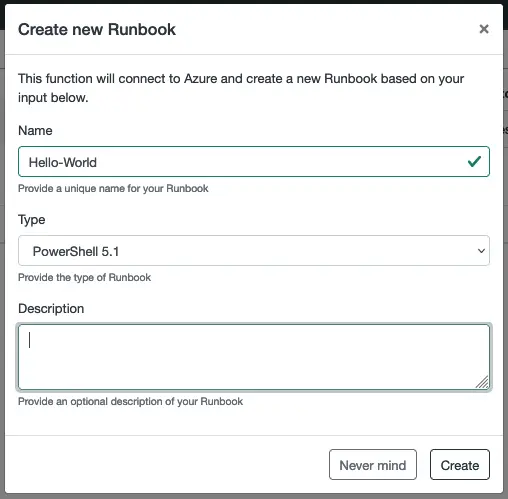
For this demonstration will set the name to “Hello-World” and “Runbook type” to “PowerShell”. Once this is done, click the “Create” button. This will send the request to your Azure Automation Account for creation of the Runbook. Once the Runbook has been created it will appear in the list of Runbooks.
Please allow for a few seconds for this to happen. The new Runbook will now appear in the list of runbooks.
Edit a Runbook
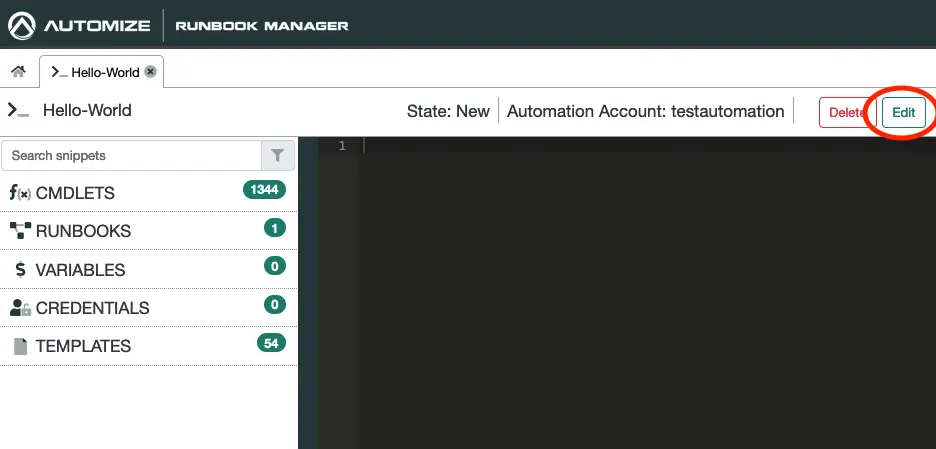
Locate the Runbook that you wish to edit in the list of Runbooks and click on it to open it.
Notice: You can only edit Runbooks with Runbook type “PowerShell” or “Python” in ServiceNow.
If the Runbook is not already in edit mode, click the “Edit” button in the upper right corner to edit the Runbook. If the runbook is already in edit mode, the “Edit” button will not be visible.
In the editor we will now enter the PowerShell code that we wish Azure Automation to execute when we start a new Job from the Runbook. Here is some sample code, that we will use in as an example:
Param(
  [string]$testInput
)
$ErrorActionPreference = "Stop"
try {
  Write-Verbose "Runbook started"
  $output = @{'result' = $testInput
              'error' = ''
  }
} catch {
  $output.error = "Runbook failed"
  Write-Verbose "Runbook failed"
  throw
} finally {
  Write-Output $output | ConvertTo-Json
  Write-Verbose "Runbook completed"
}
In the above example we require one input which is of type “string”. We then set the error action preference of the runbook to stop to ensure that PowerShell will stop processing if an error is thrown. We then wrap our code into a try, catch and finally block. This is not mandatory, but it makes managing the Runbook easier and is recommended.
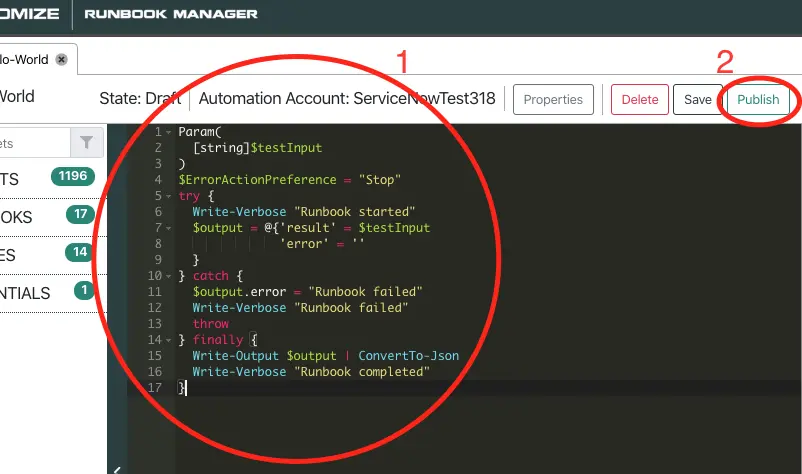
In the above we use Write-Verbose and Write-Output. For a complete list of output streams and how to use them, please refer to the Azure Automation documentation. Notice that we output an object as JSON. This makes it easier for us to handle the output in ServiceNow once the job has completed.
Once you are satisfied with the content of your Runbook click the “Publish” button. This will publish the Runbook in Azure with the content that you have just provided.
Notice: It is only when you click “Publish” that the Runbook will be updated in Azure. You can thus “Save” the Runbook as you work on it without affecting the published version of the Runbook in Azure until you do not click the “Publish” button.
Once you are happy with the changes click “Publish” to publish the Runbook again.
Test a Runbook
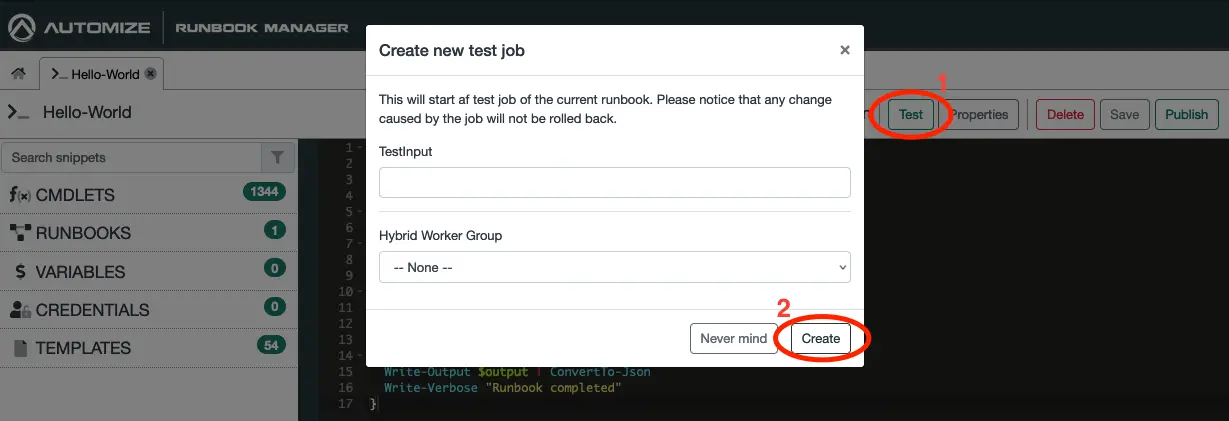
You can test a Runbook before you publish it. While the Runbook is in edit mode click the “Test” button and fill out your test input. If you wish to test you code on a Hybrid Worker make sure to select a Hybrid Worker Group. Click on “Create” to start the test
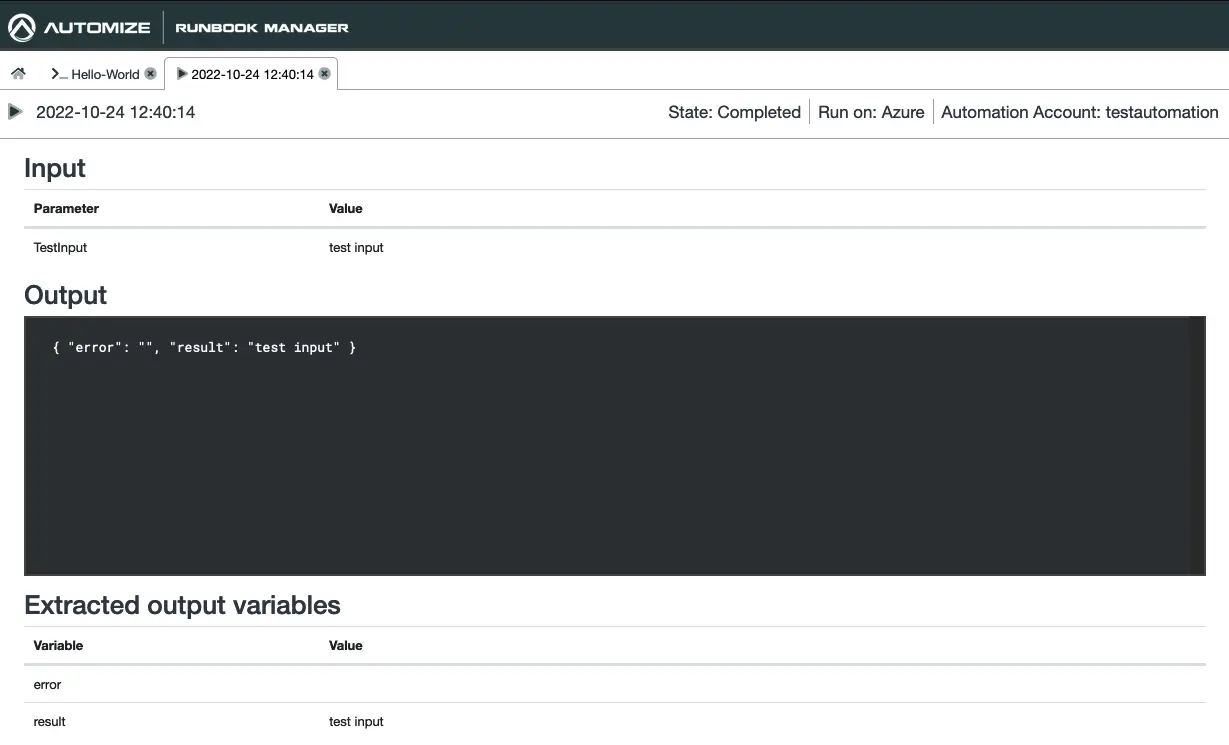
A new tab will open and display the output from the test job that you have just created. The progress will be monitored so there is no need to manually refresh the page.
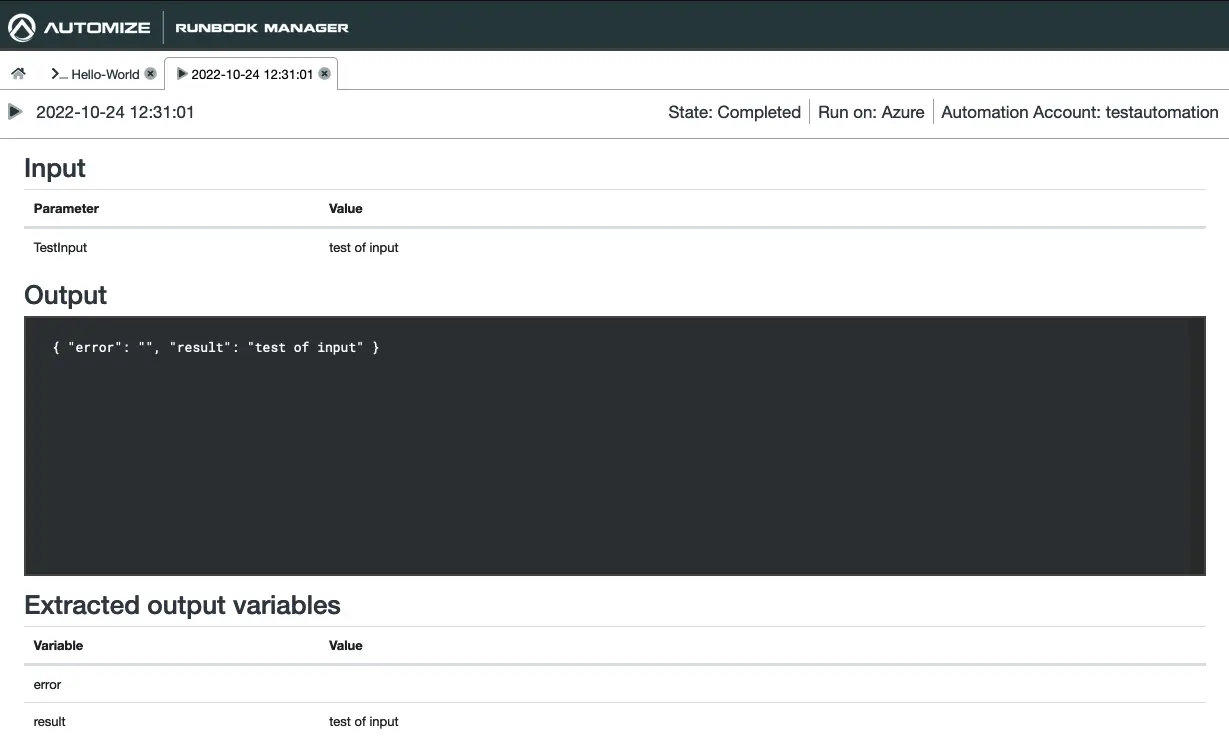
The Input section will show the parameters that you submitted to the job. The Output section will display all output from the job as it executes. The Extracted output variables will parse the output and search for any JSON formatted text and create this as output variables.
Outputting JSON is the recommended way of working with output and will make it easier for you when constructing your flows or workflows in ServiceNow.
You can easily get back to the Runbook to make any modifications by closing the tab.
Notice: A test job will execute the code that you are testing. Any potential effect on other systems needs to be manually rolled back.
Run a Runbook
Running a Runbook, also reffered to as starting af “job” can be easily done using Runbook Manager.
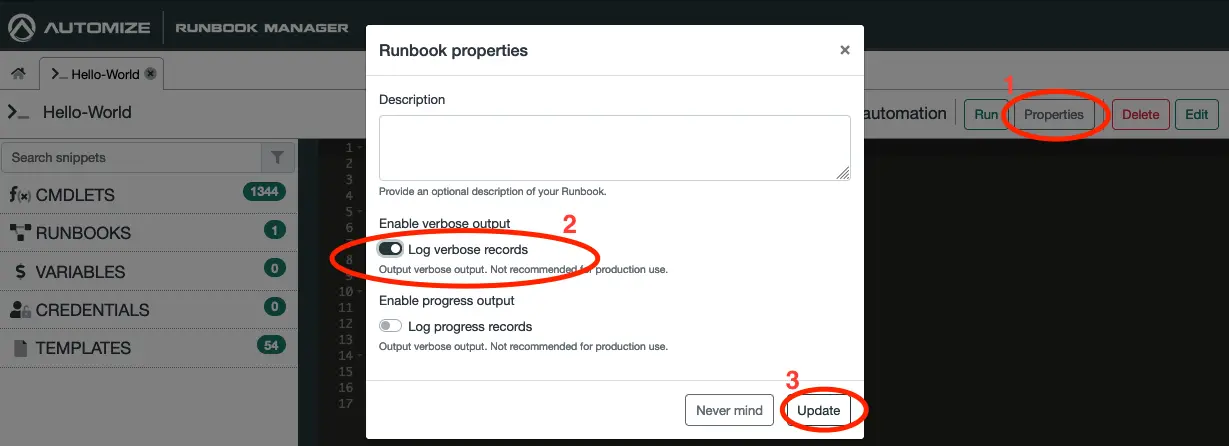
Working with Verbose Output
By default verbose output is not captured. If you wish to capture verbose output on a Runbook open the Runbook and click “Properties”. Then change Log verbose records to on and click on Update.
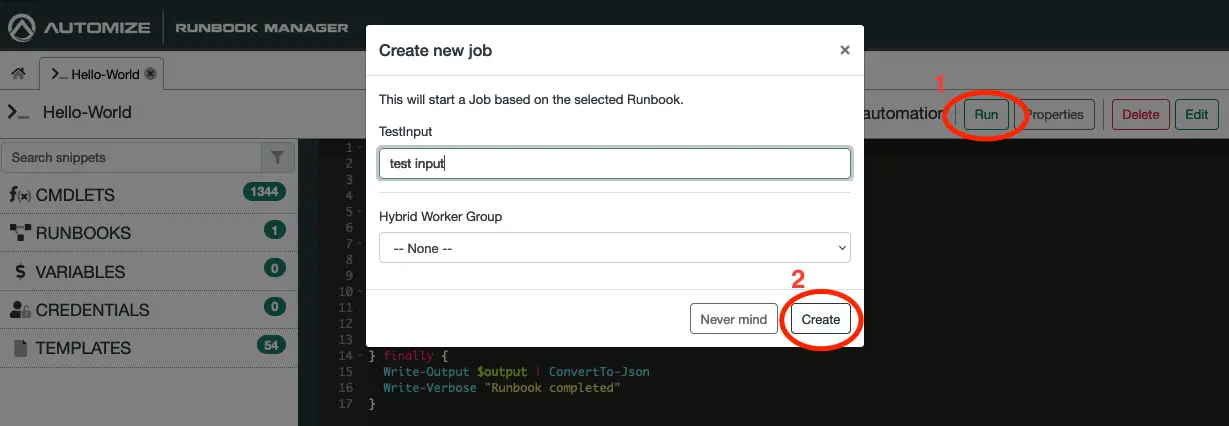
Next click the Run button to start the Runbook as described in the section above.
Fill out the input fields and click Create to Create a new job.
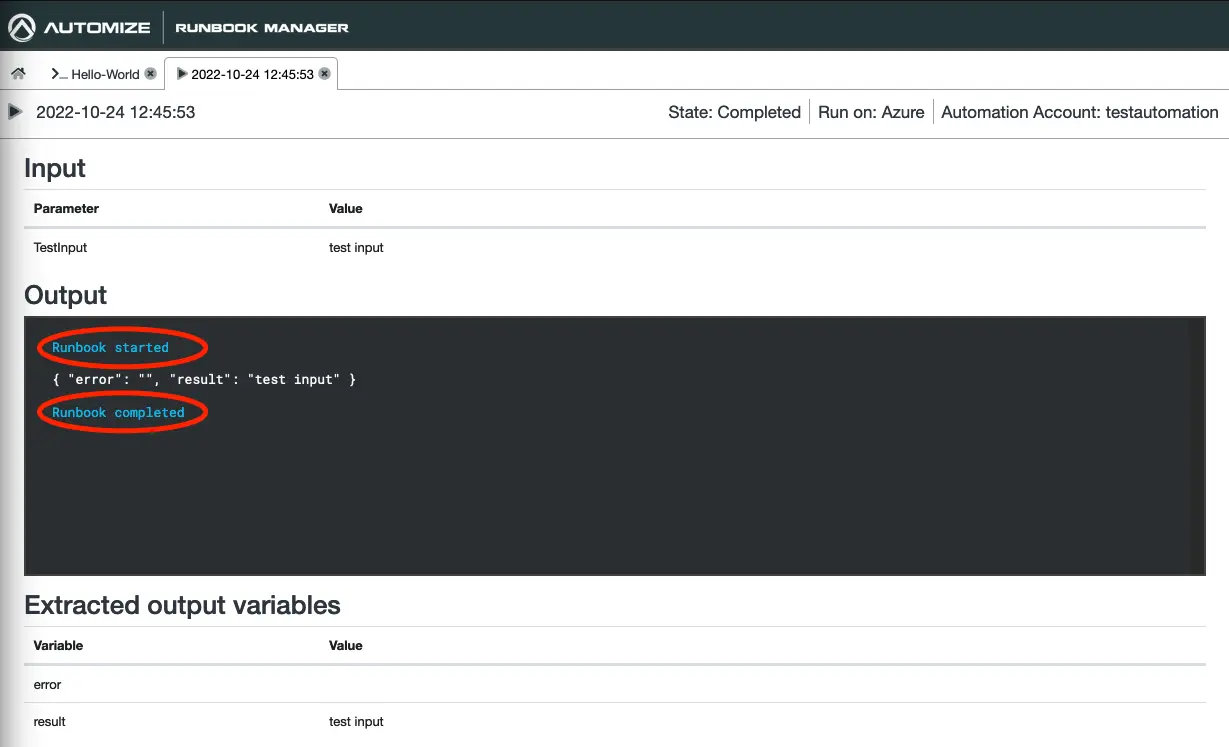
The job will now be executed. Notice that the verbose output from our Runbook is now outputted. It is recommended to enable verbose output only for testing purposes.