Create an Azure Active Directory User
In this guide we will show how to use some actions in flow designer to create an Azure Active Directory User.
Create a Service Catalog Request
In this step we will create a catalog item that we can use to trigger the flow that will create the Azure AD User.
Create Catalog Item
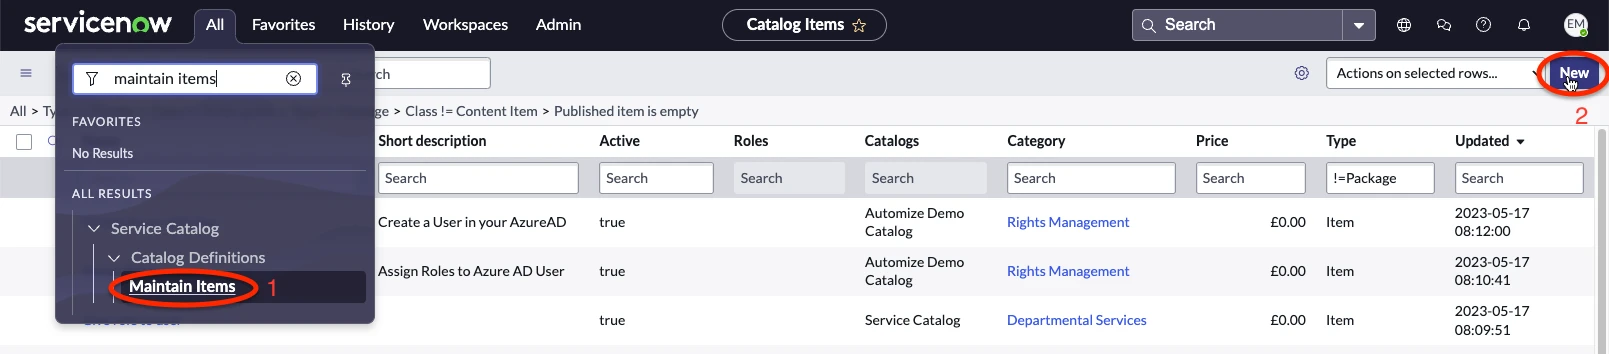
From the Application navigator navigate to Maintain items and click New button.
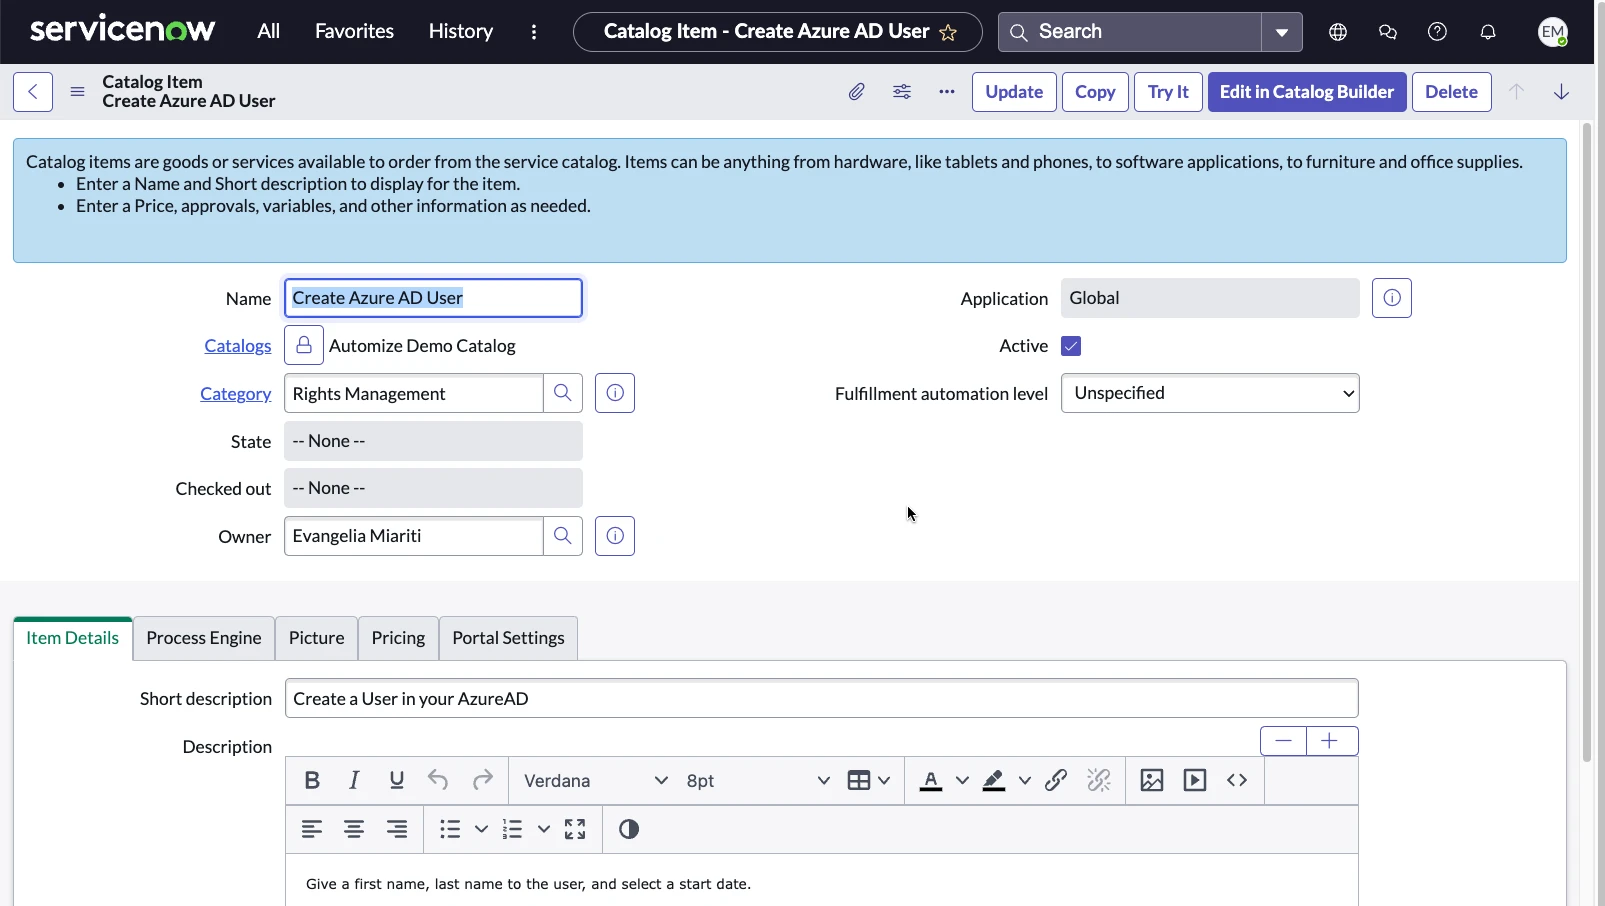
Input a name for the Catalog Item like the one show below “Create Azure AD User”, select a Catalog and a Category for the Item to appear in and add a Short description and a Description for the Catalog Item. Then right click on the grey bar at the top of the form and select save.
Scroll down on the form, select the Variables related list and click on New.

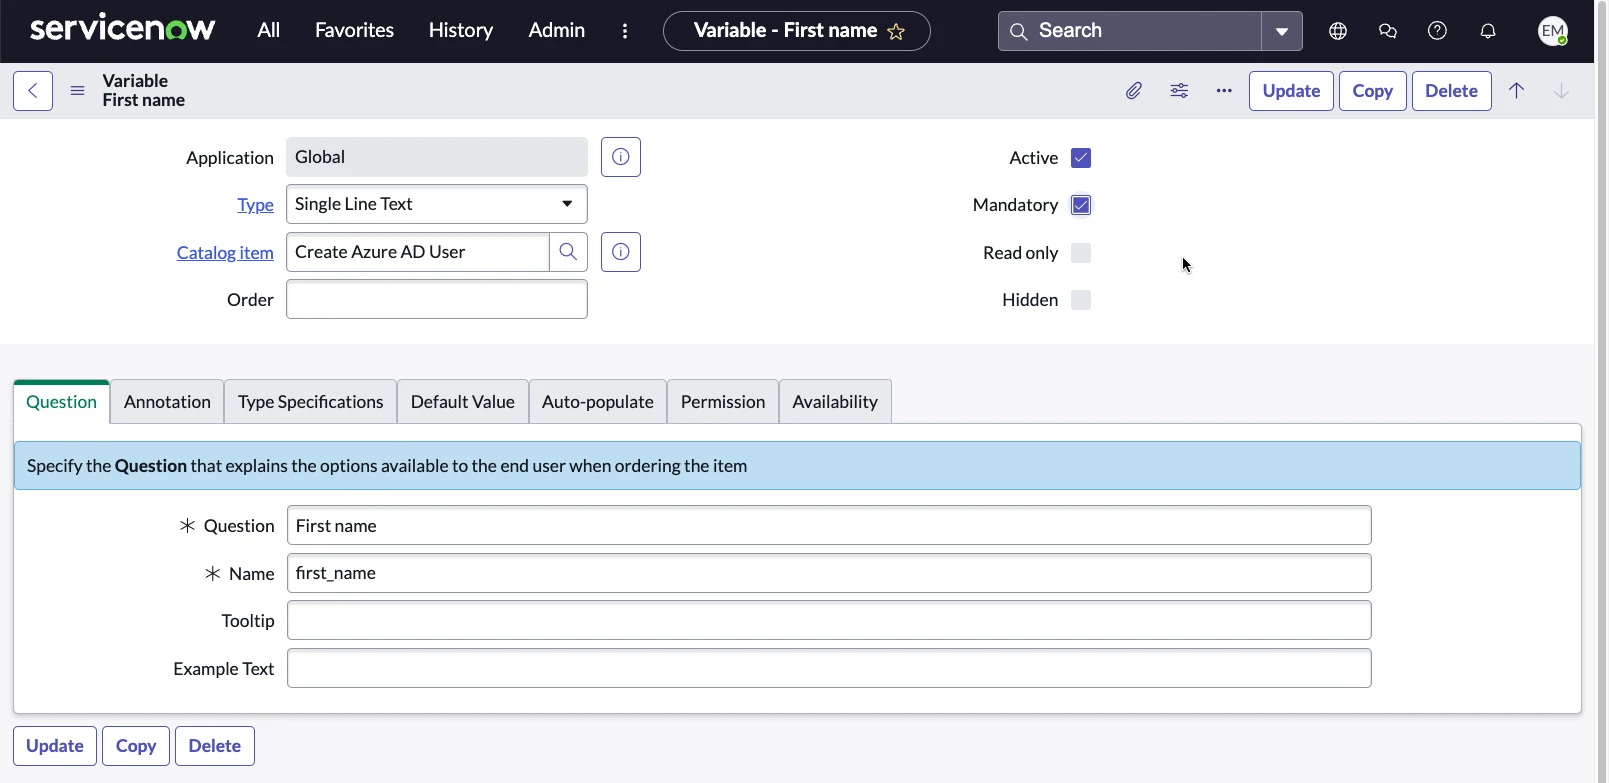
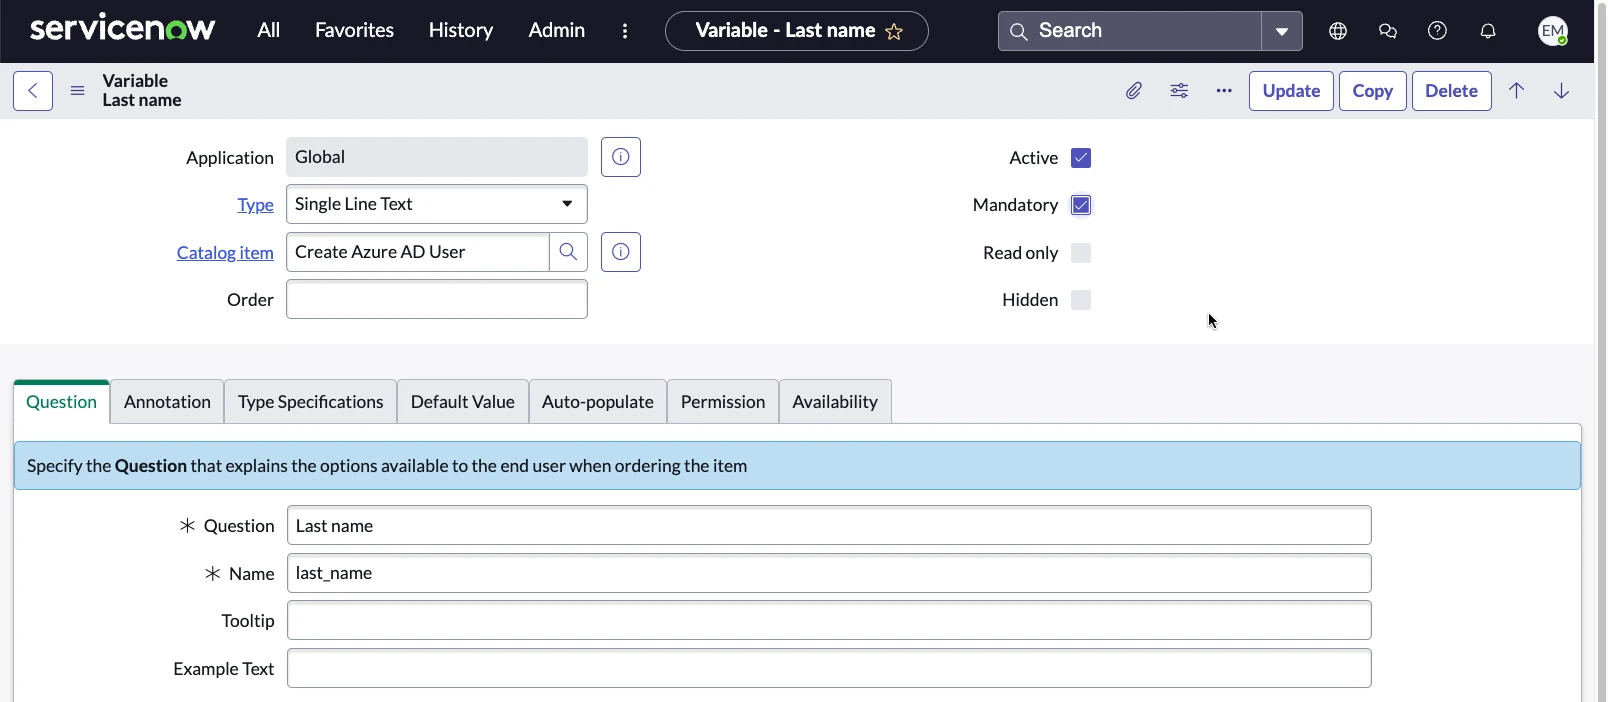
Set the type of the variable to be “Single Line Text” and set it to be mandatory. Set the question to be “First name”.
Then click on Submit and repeat this step for the variable “Last name”.
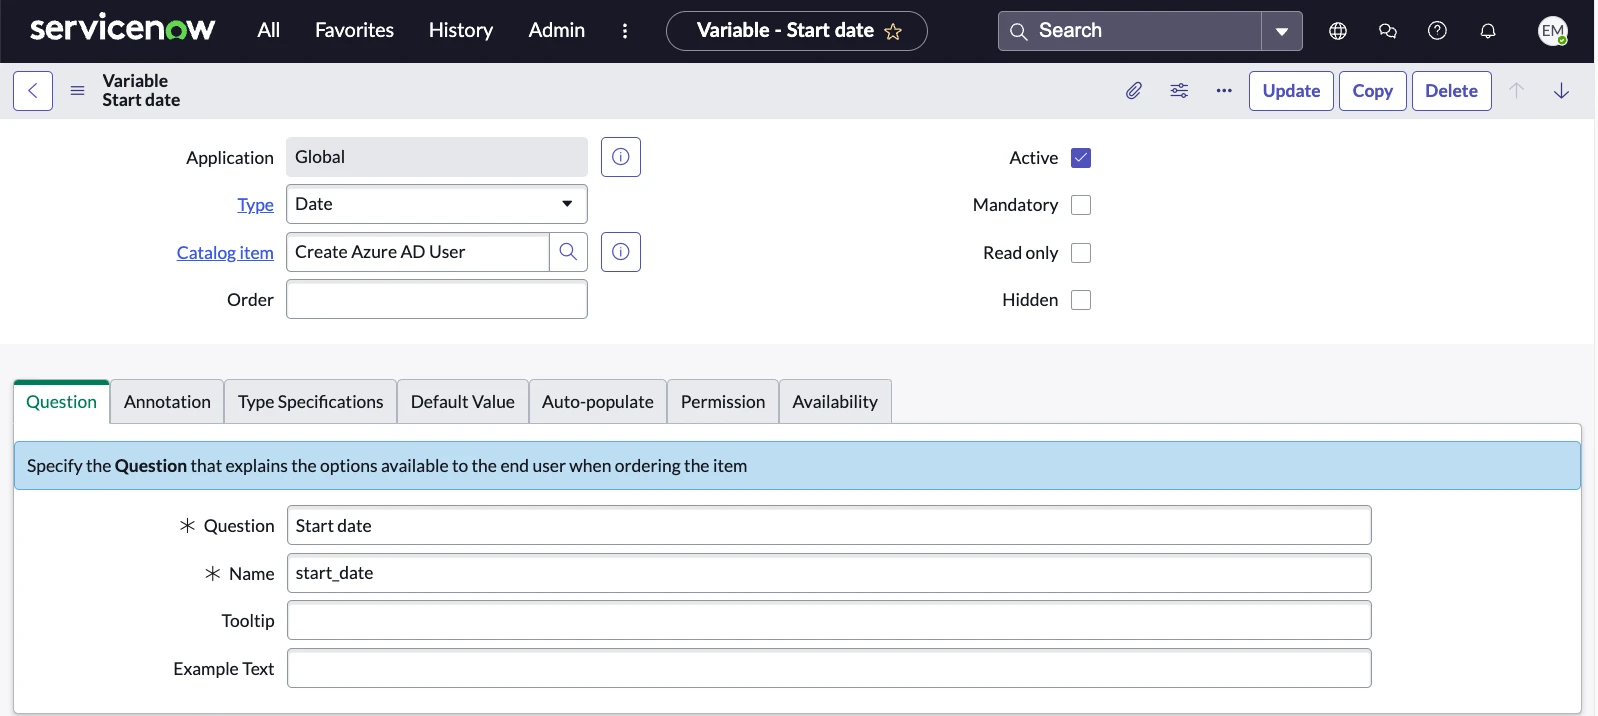
You can also create a variable of type “Date” to define the start date of the new Azure AD User.
Create Flow
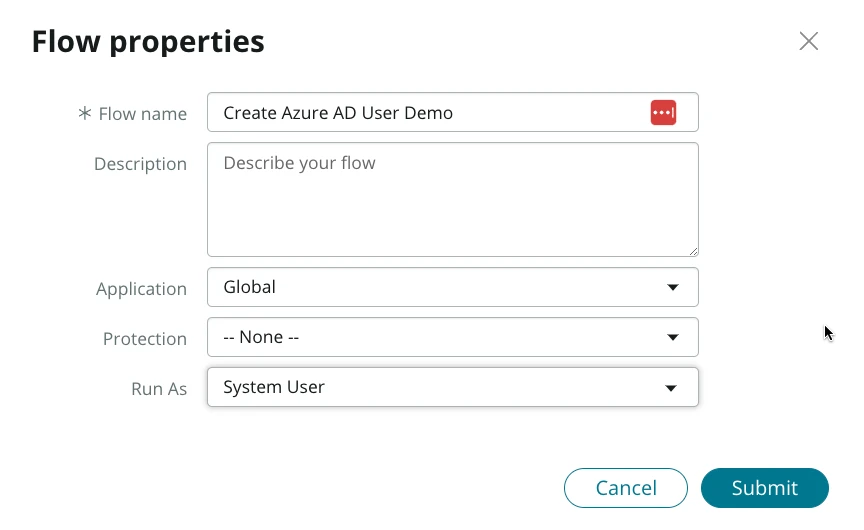
Now use the application navigator to go to Flow Designer and create a new Flow. Give a name to the application select the Rights Management App as application and Run as System User and then click on Submit.
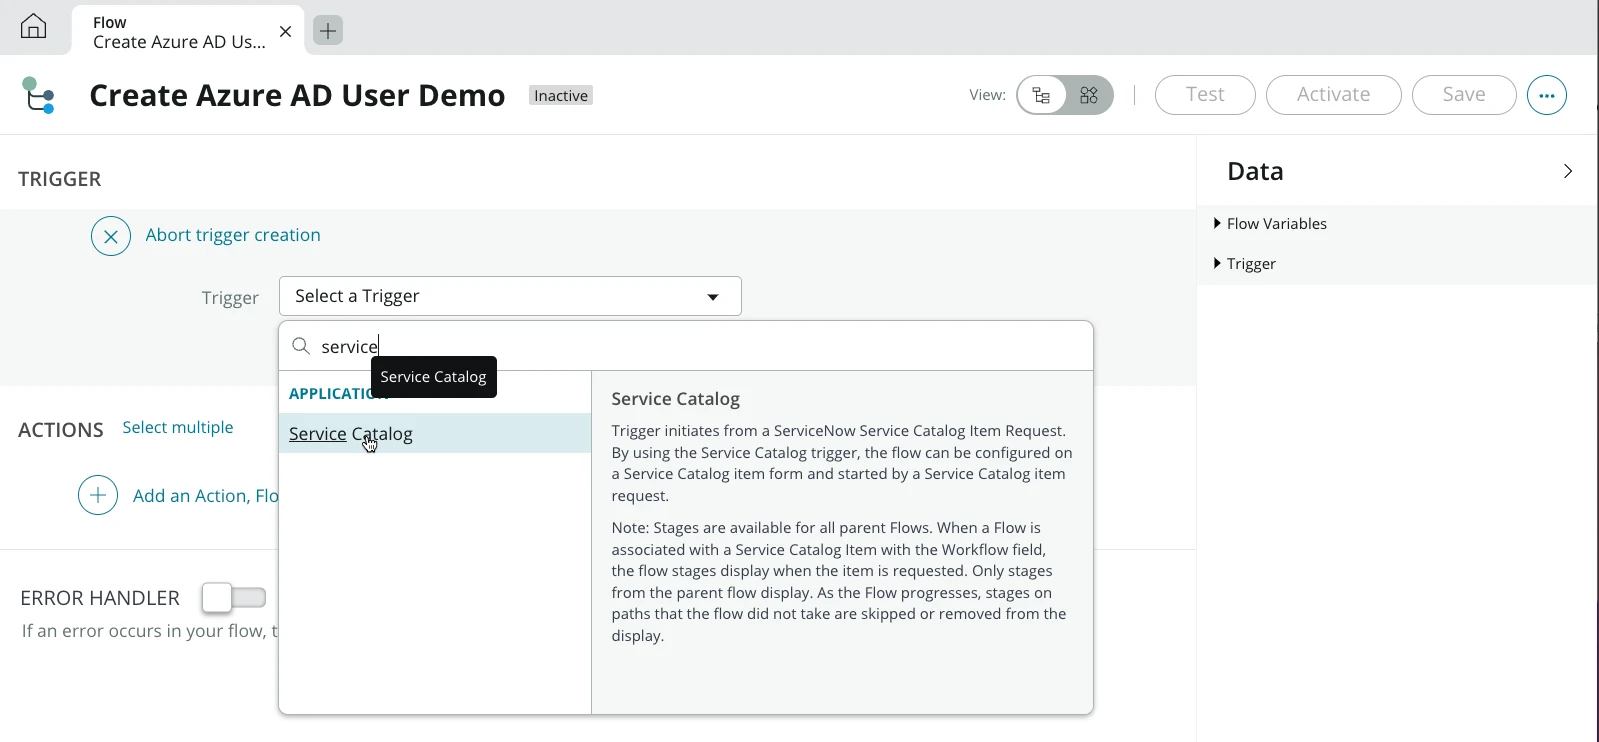
In the flow page click on Add a Trigger and select Service Catalog.
Then select the action : Get Catalog Variables.
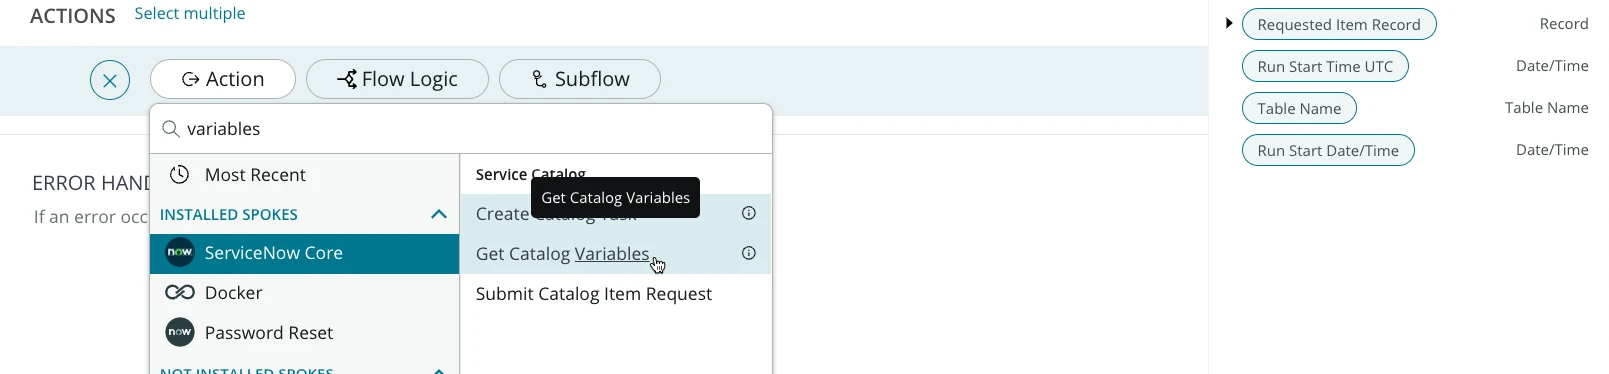
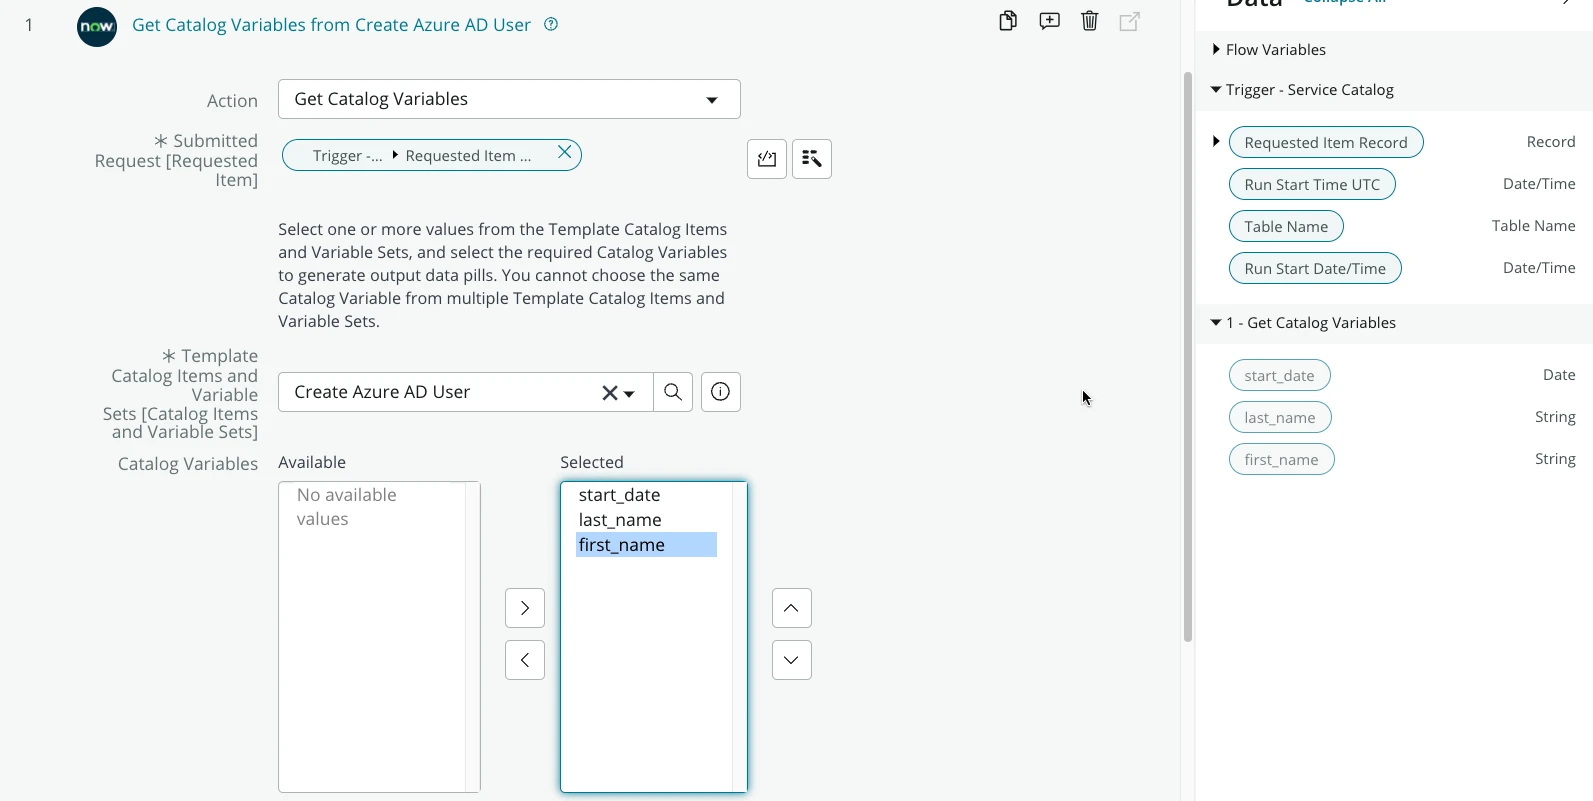
Drag and drop the Trigger>Request Item Record in the Submitted Request field, select the Create Azure AD User in Template Catalog Items and Variable Sets and select all the available catalog variables from the Catalog Variables list and drop them in the selected list. Then click on Done.
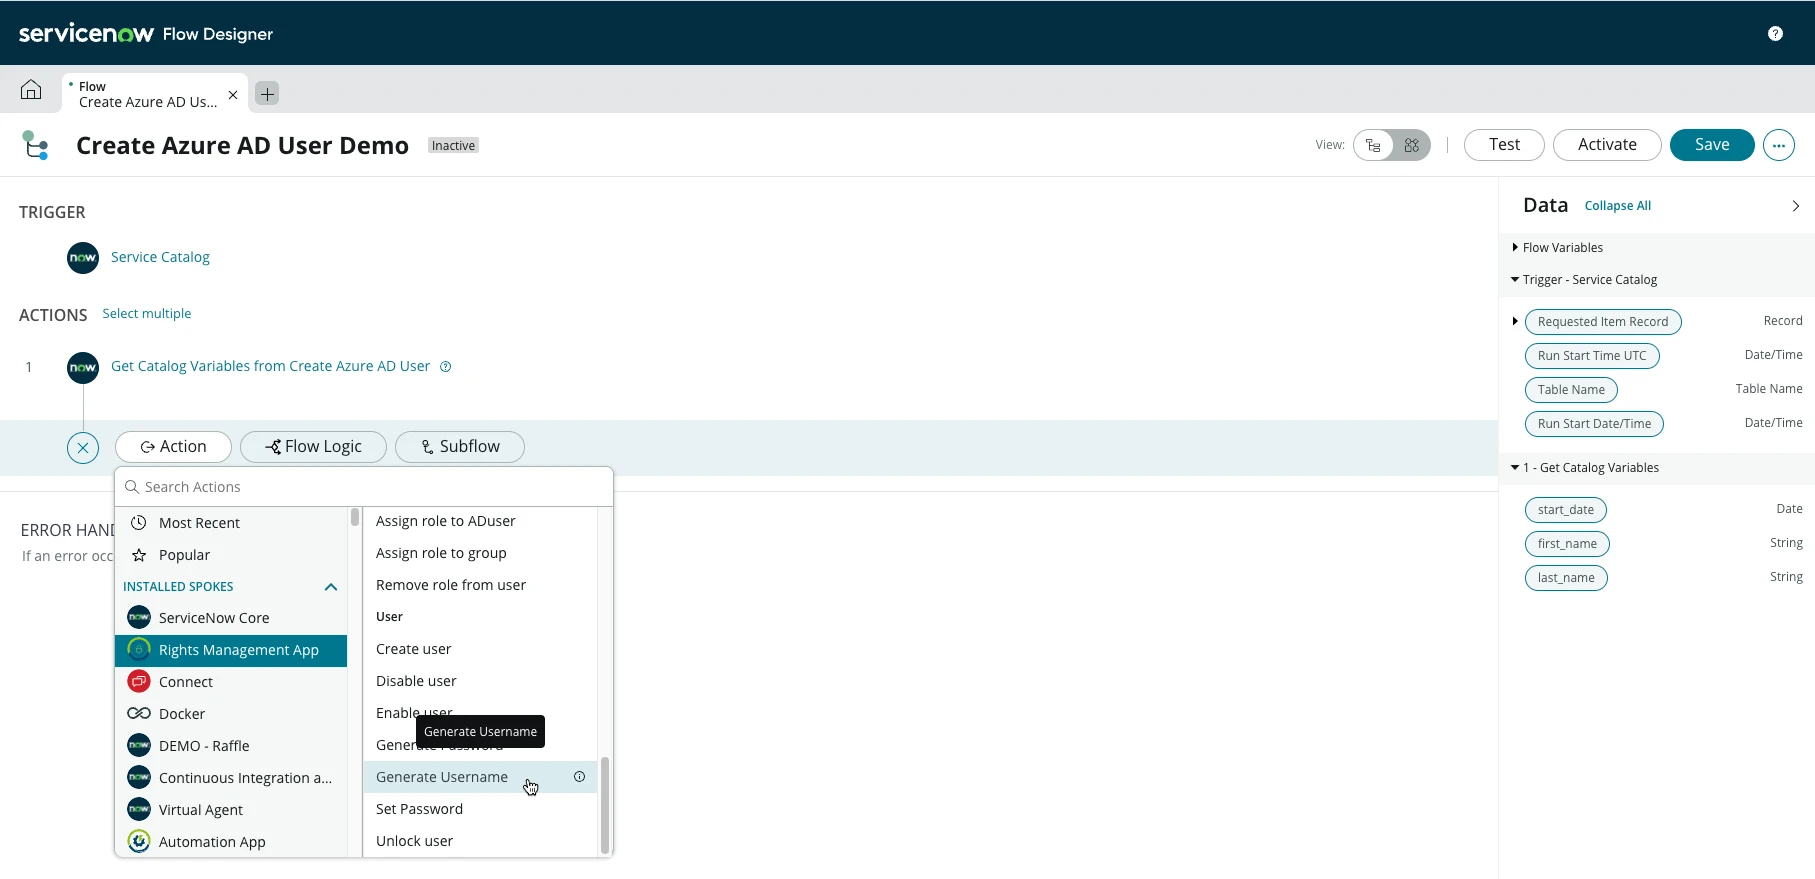
Next click on Add an Action, Flow Logic or Subflow and select Action > Rights Management App > Generate Username.
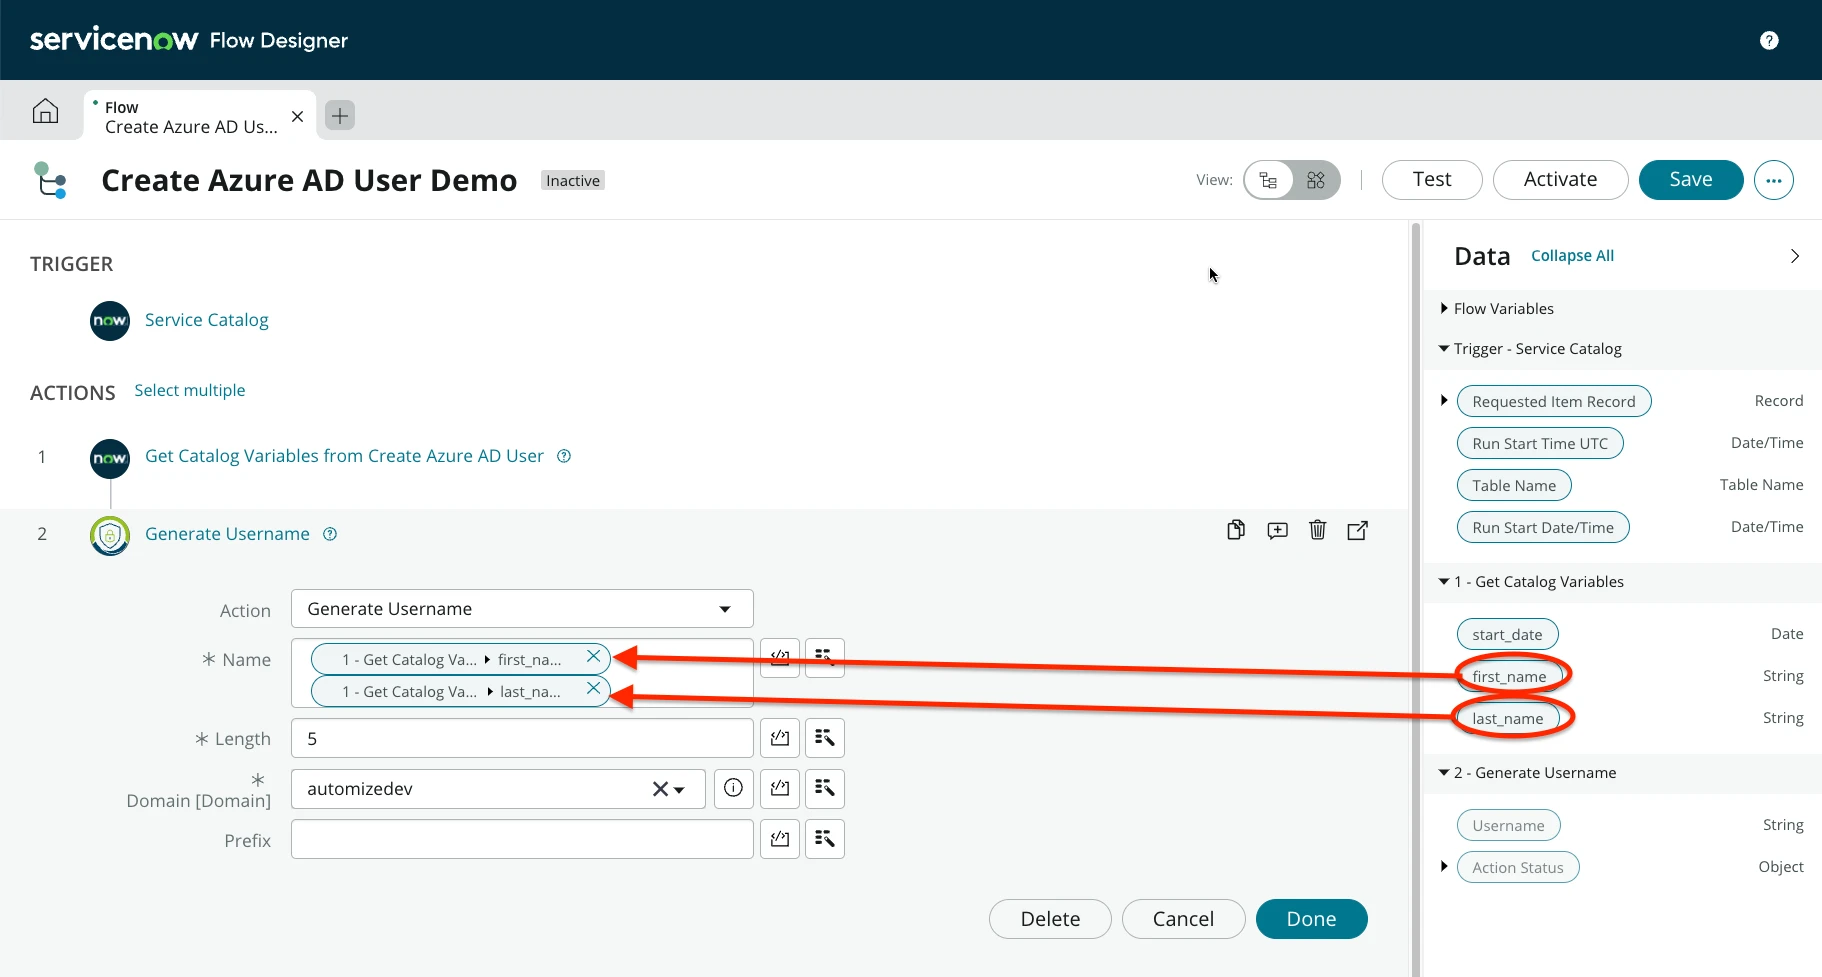
Drag and drop the first_name and last_name catalog variables from the data pill on the right side of the screen to the Name field of the Generate Username action. Then select the length of the usaname you want to be generated, the domain and if you want a prefix.
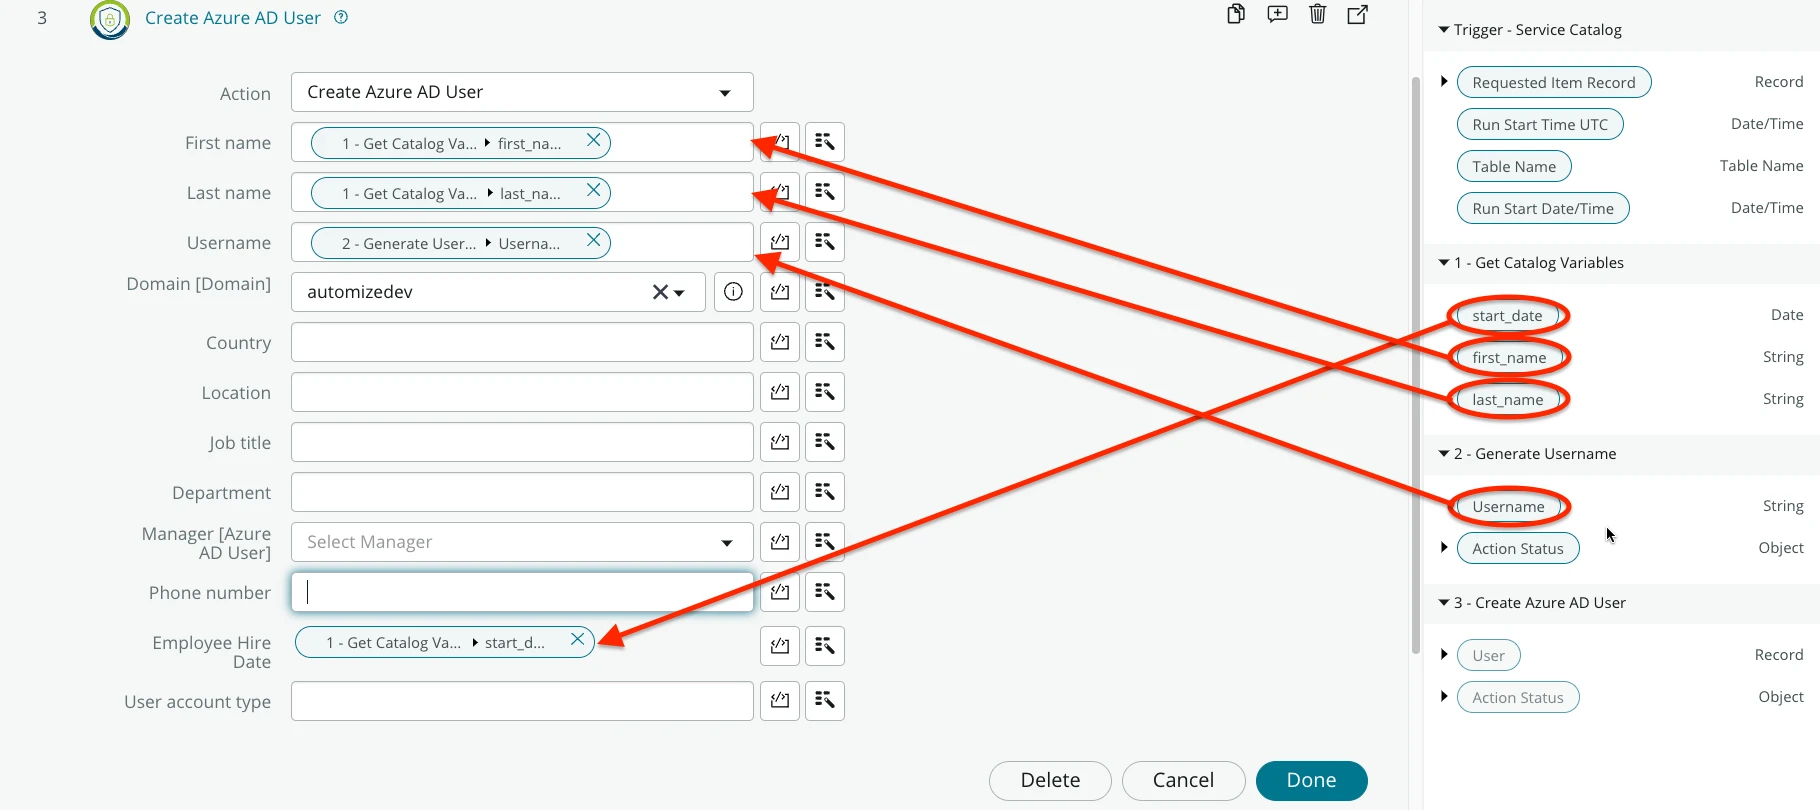
Next click on Add an Action, Flow Logic or Subflow and select Action > Rights Management App > Create Azure AD User.
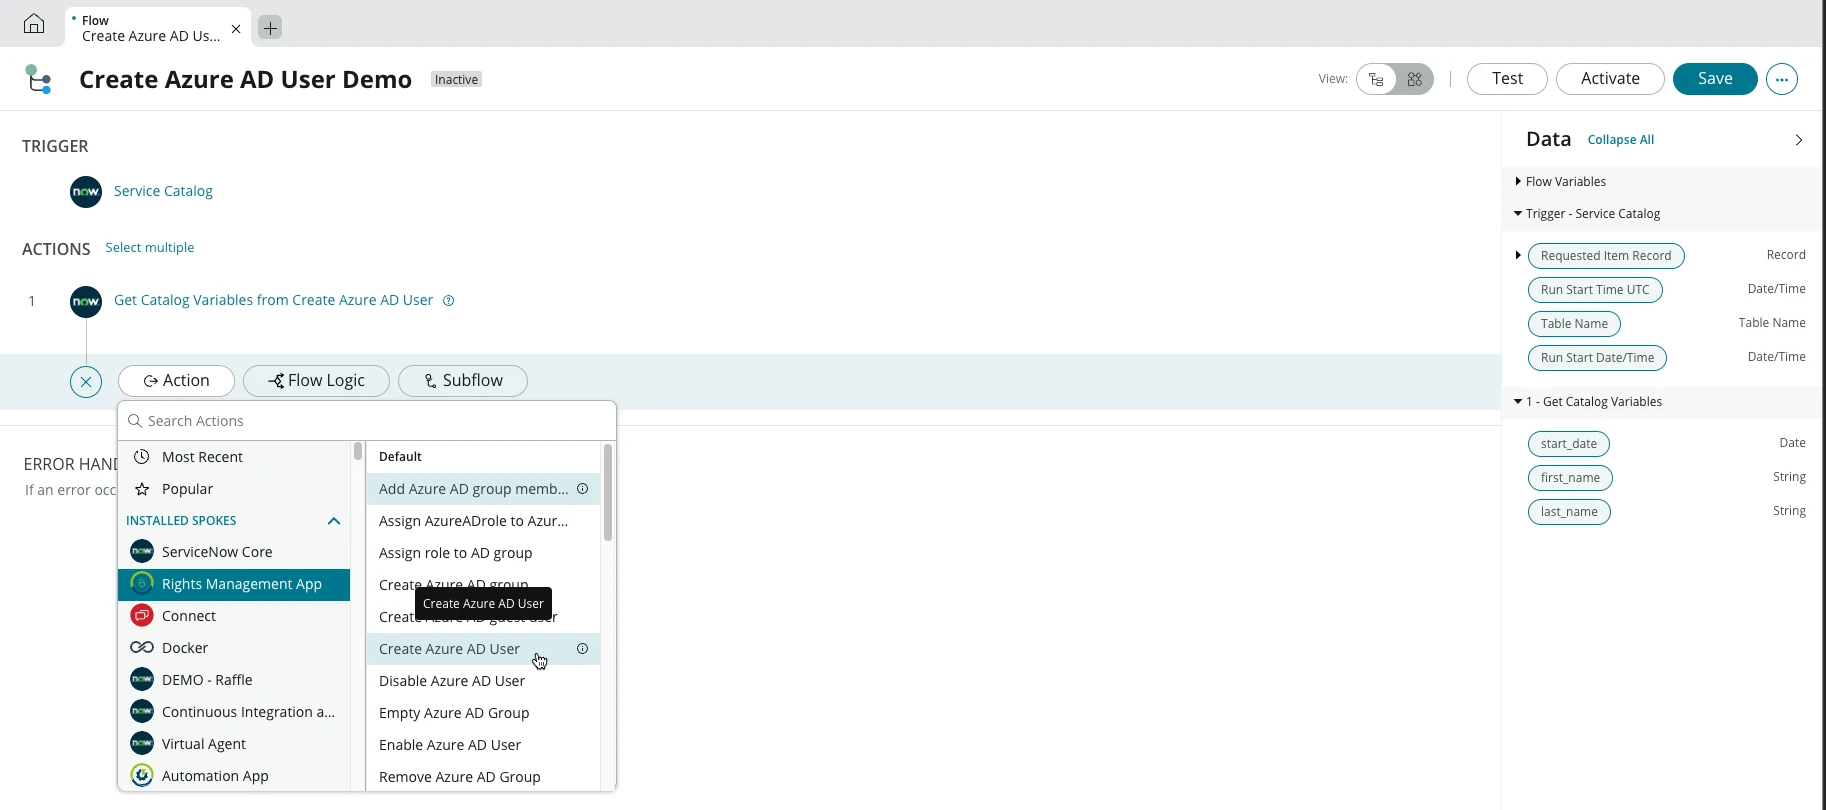
Drag and drop the first_name, last_name, and start_date variables from the get catalog variables action to the corresponding fields in the create Azure AD User action. Drag and drop the username in the data pill created from the Generate Username action to the username field in the Create Azure AD User action. Then clcik on Done.
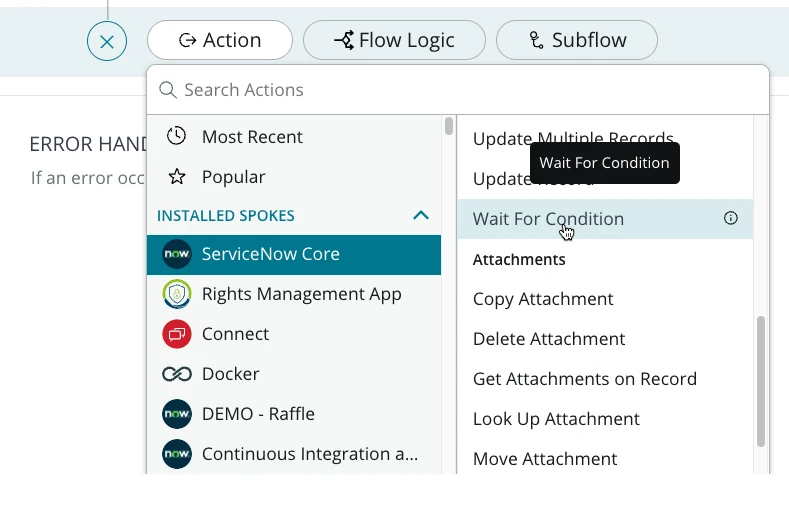
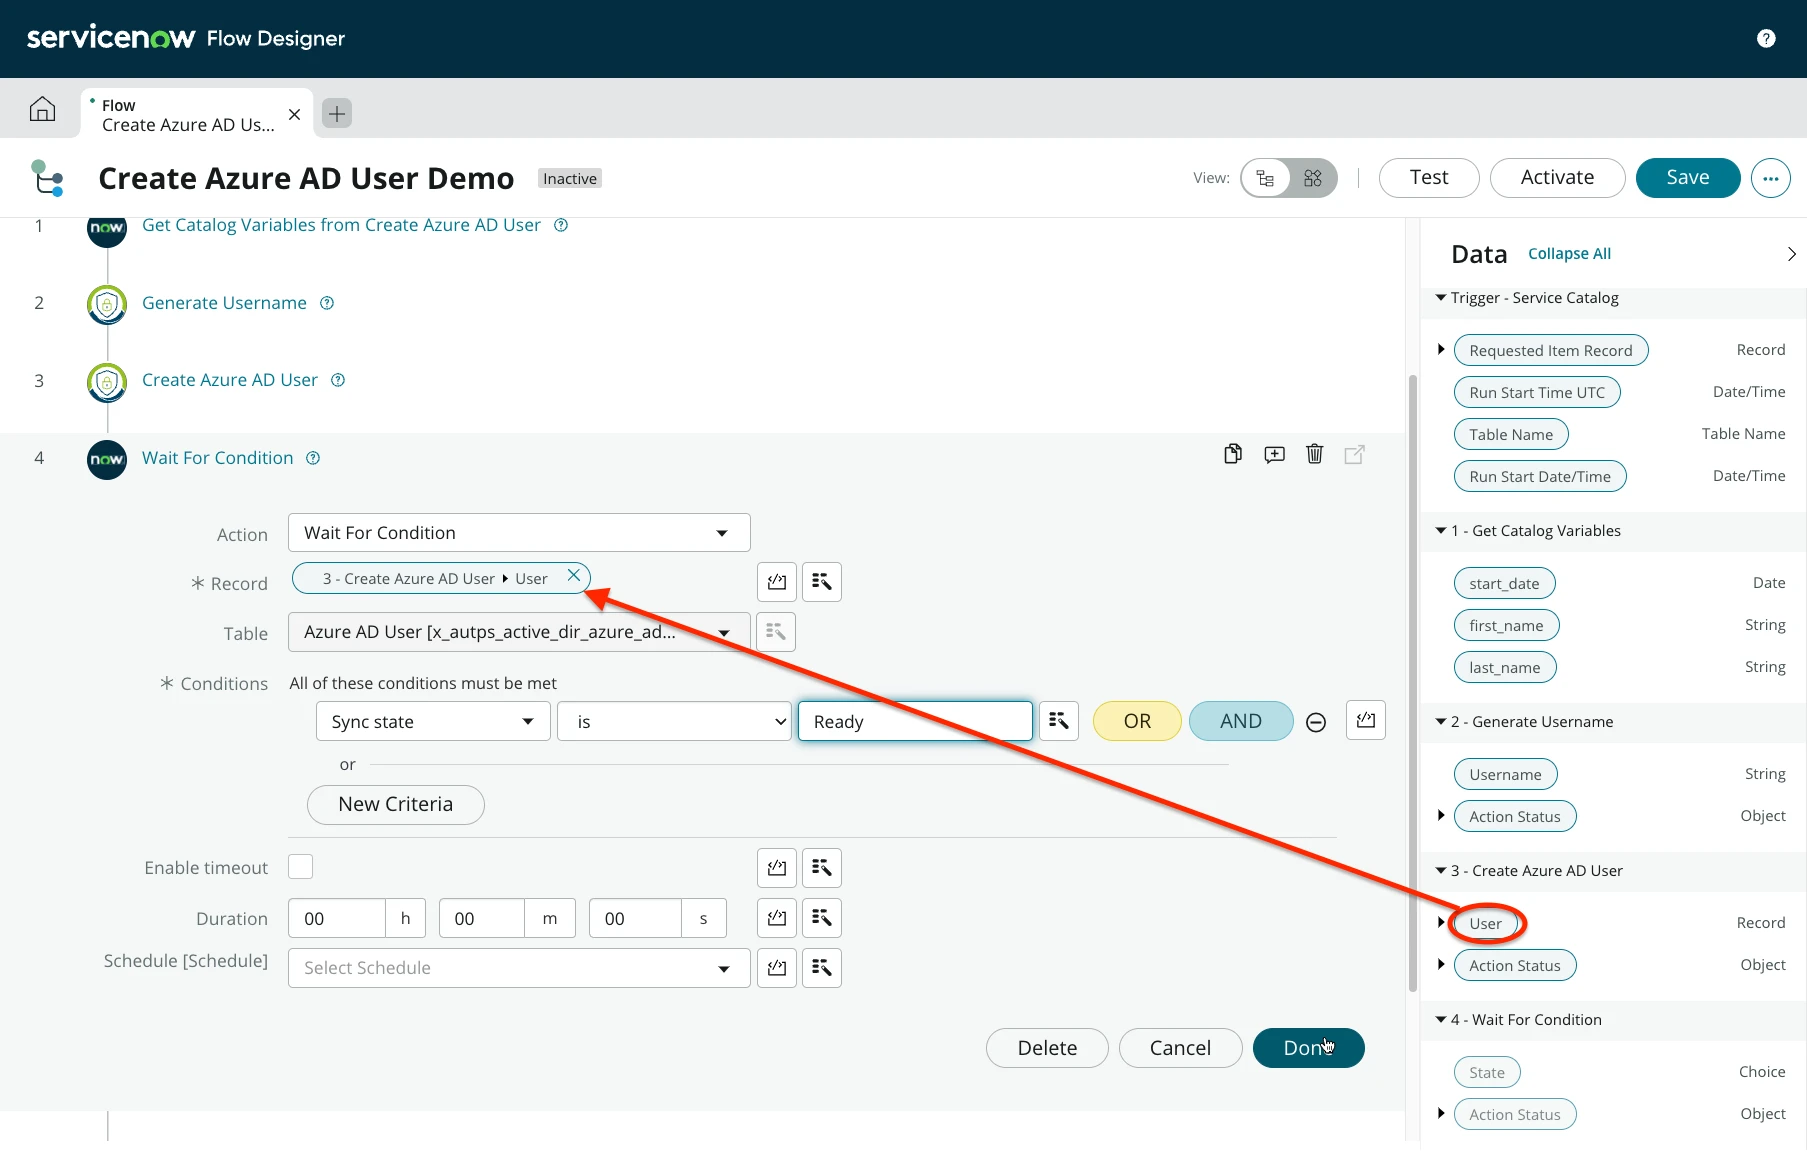
Then add Action from ServiceNow Core > Wait For Condition.
In the Record field drag and drop the User record created form the Create Azure AD User action. In the Conditions field select the Sync State is Ready. Then click on Done.
Next select the Action from Rights Management App > Generate Password.
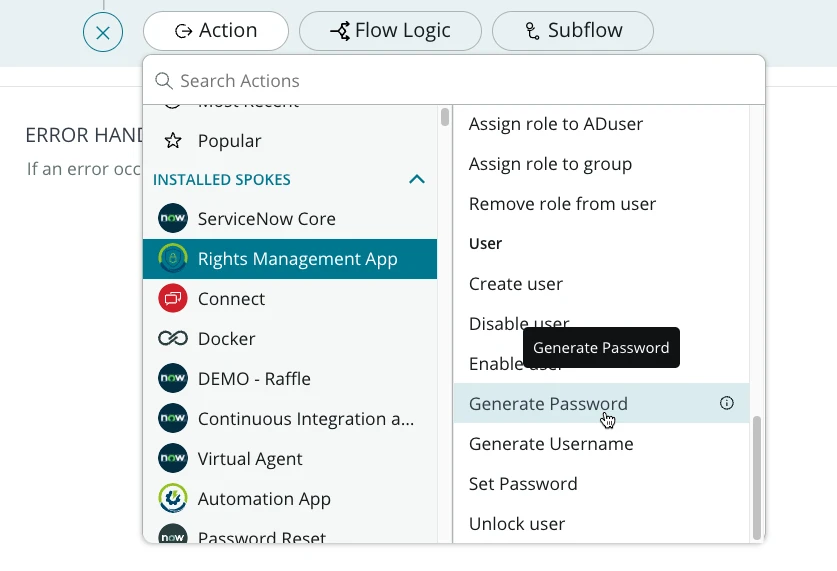
Select the domain and click on Done.
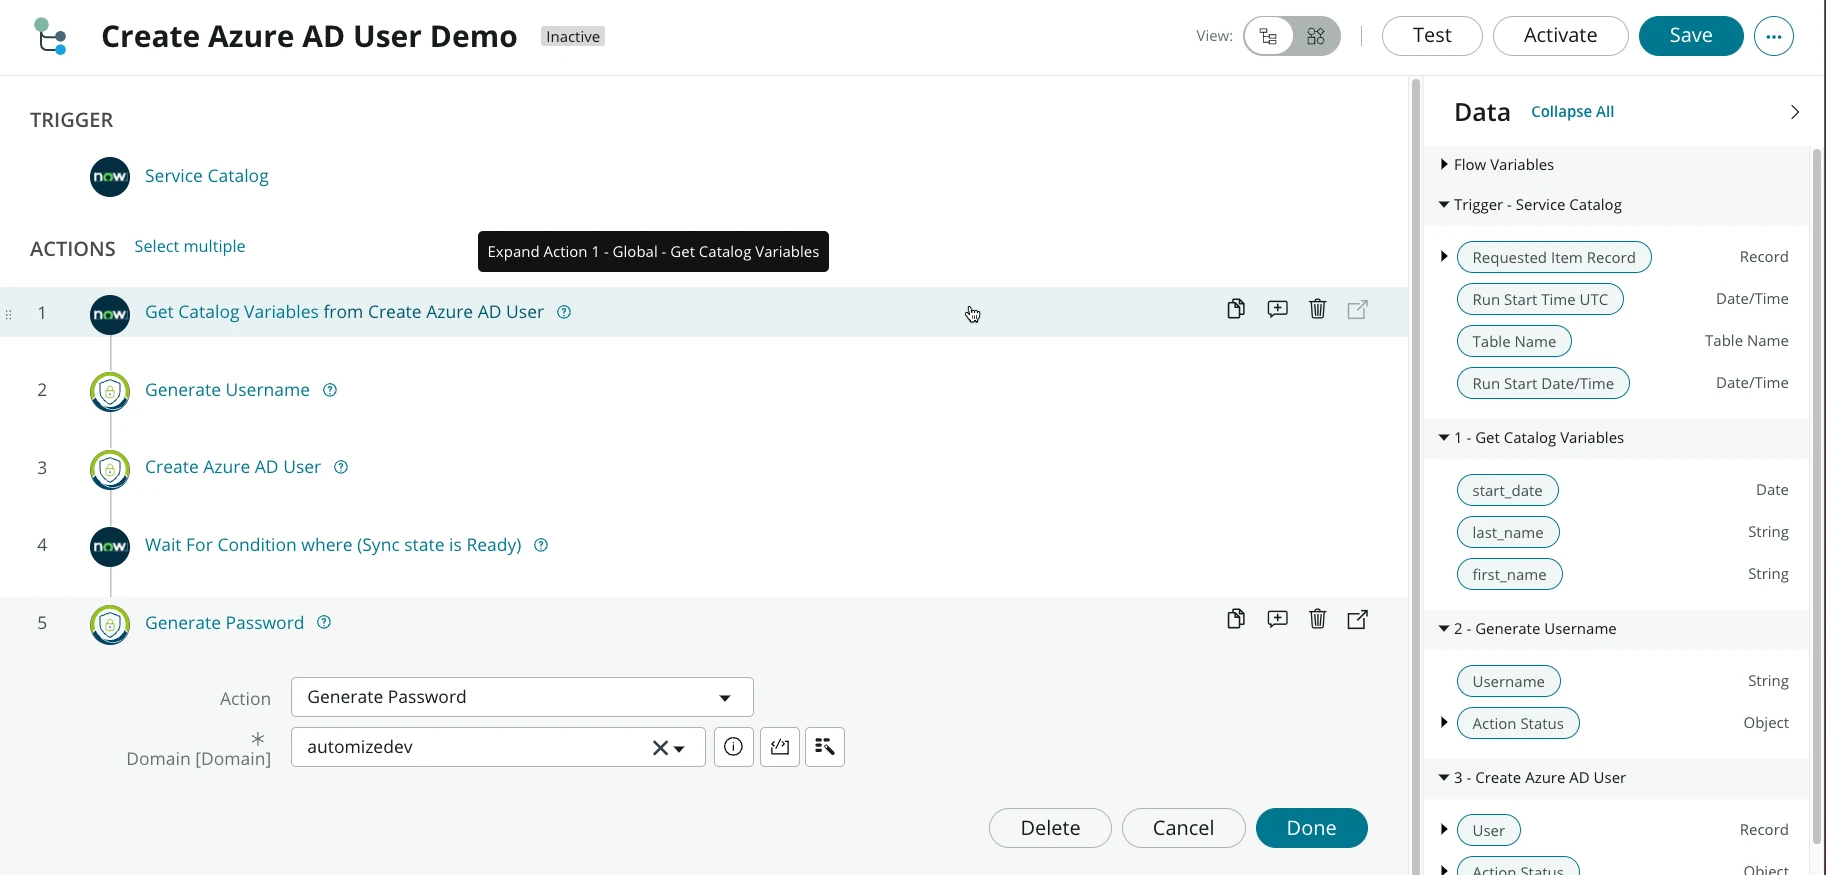
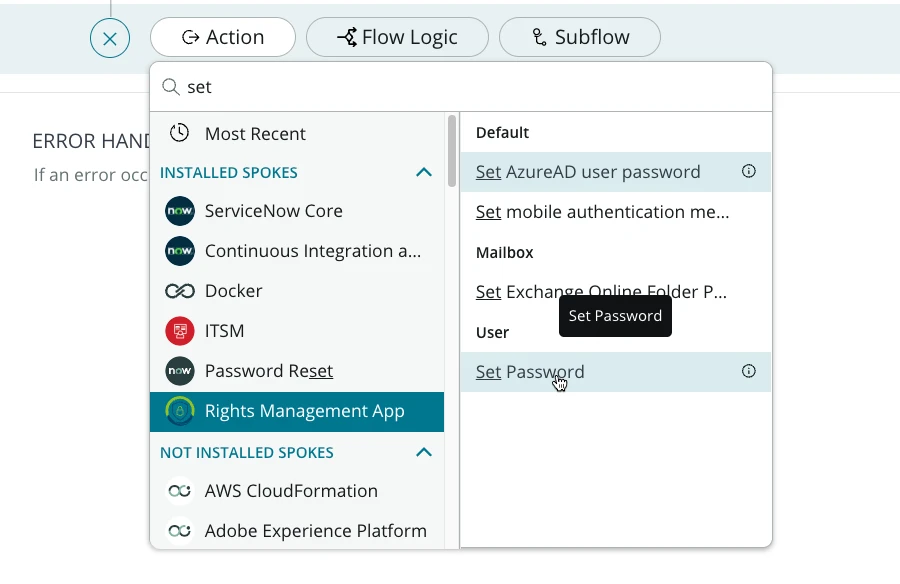
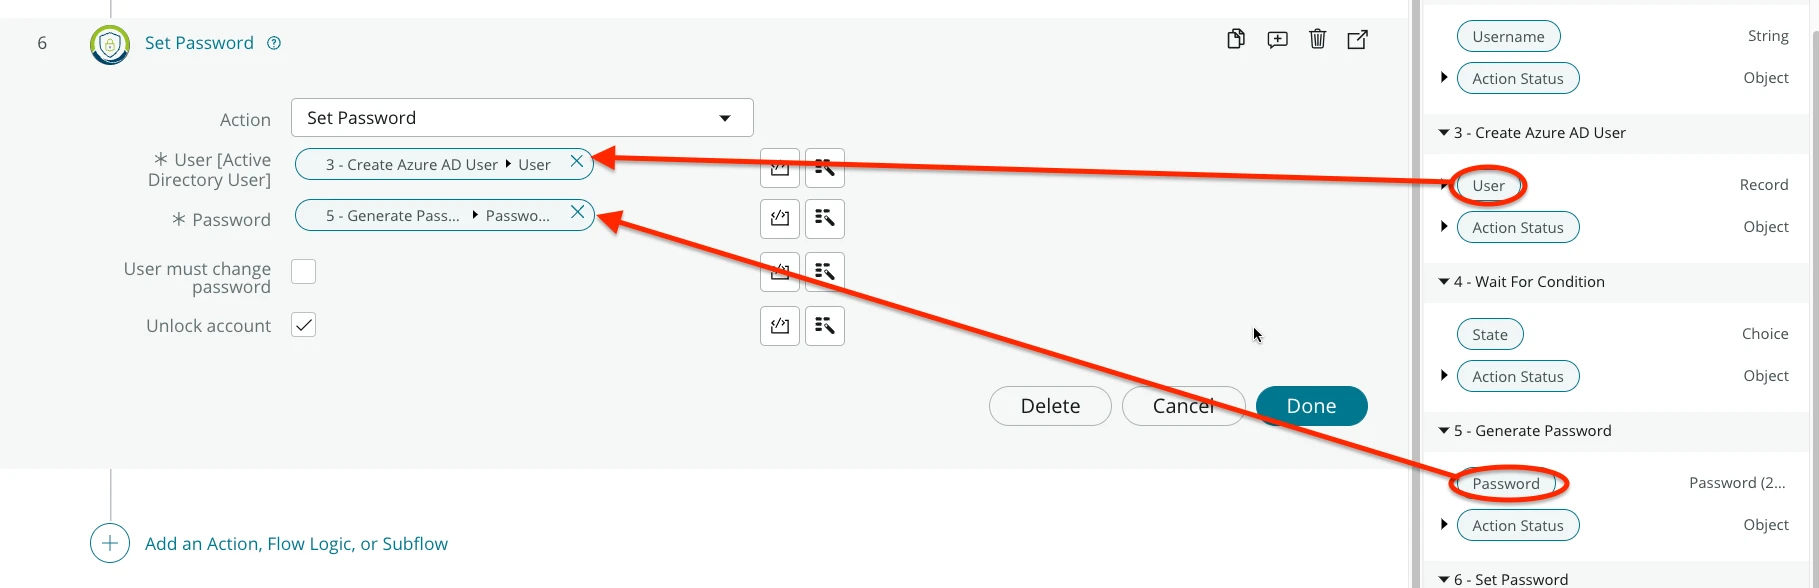
Select action from Rights Management App > Set Password.
Drag and drop the user record created and the password generated from the previous actions in the corresponding fields. You can choose if you want the user to chande the password and if you want to unlock users account. Then click on Done.
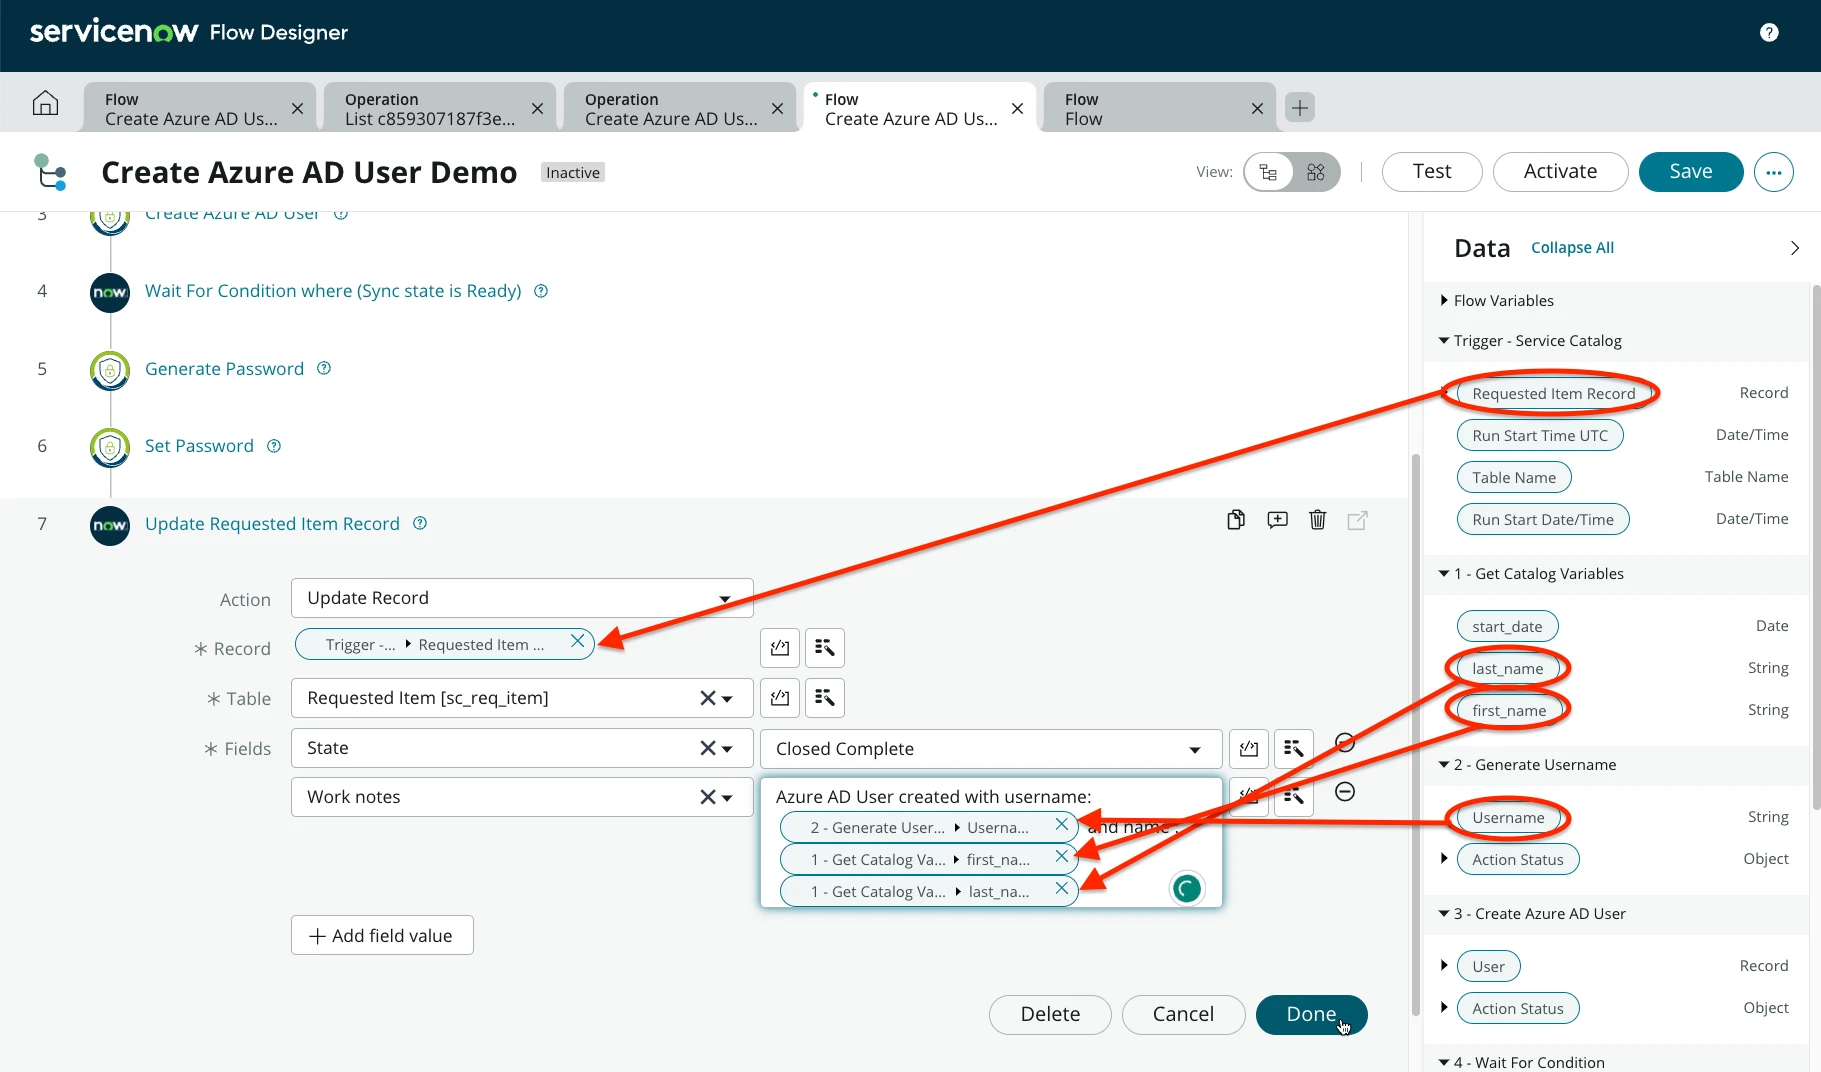
Next select the Action from ServiceNow Core > Update Record.
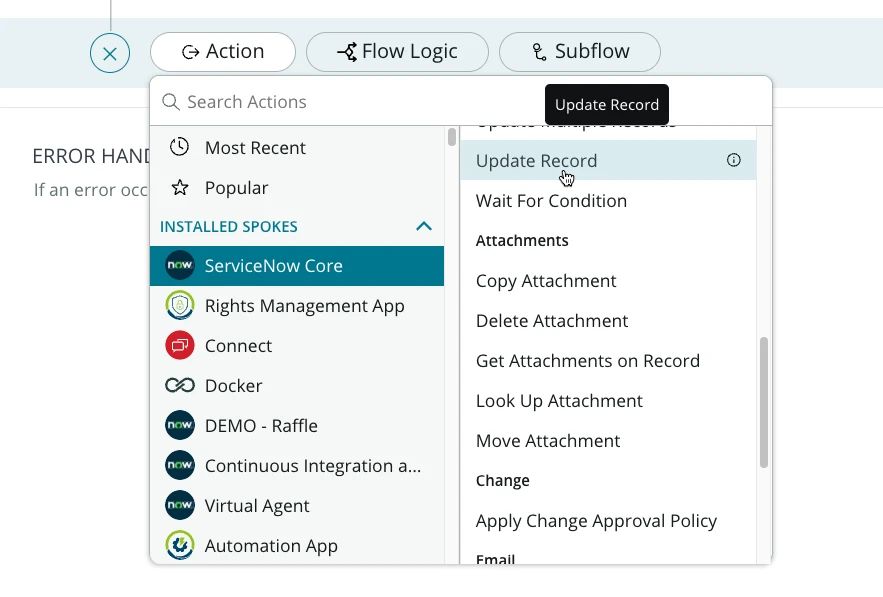
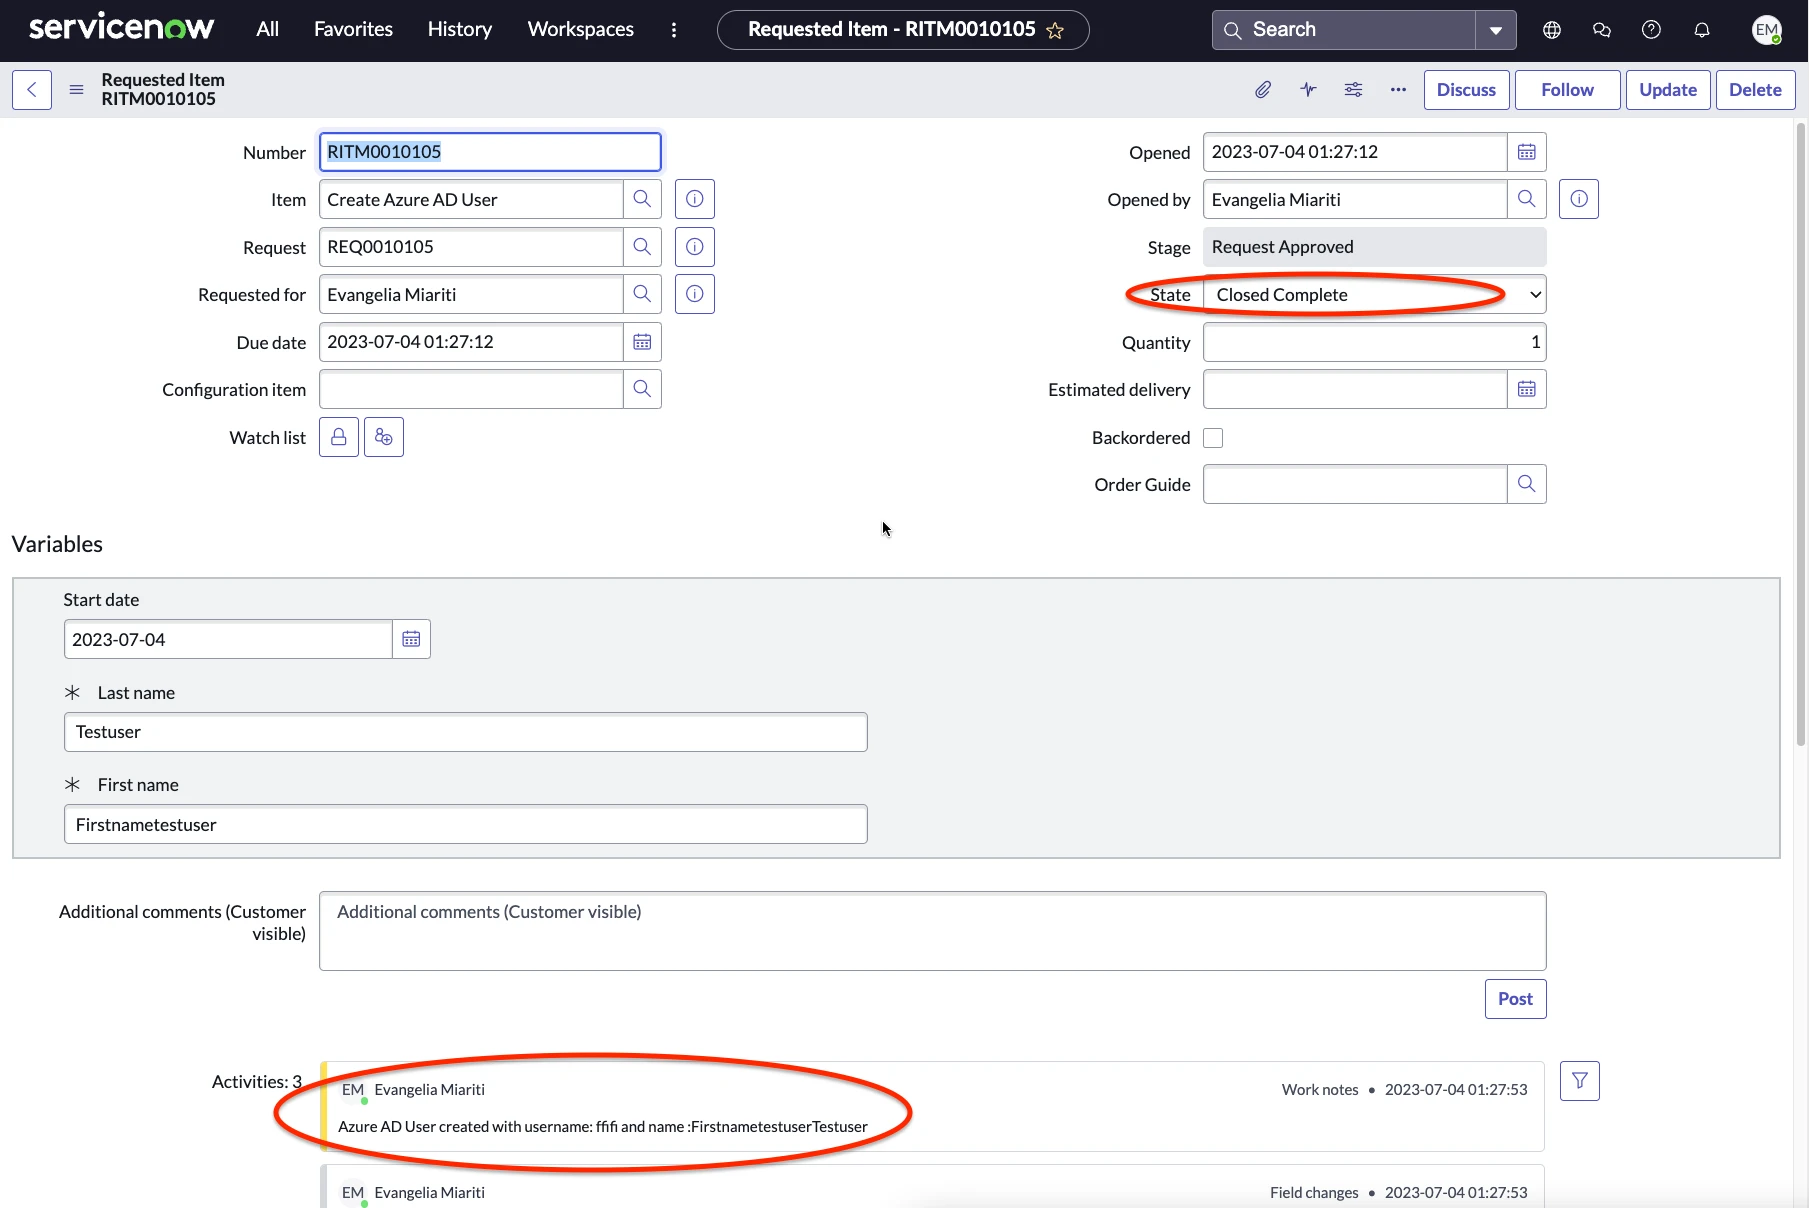
In the Record field drag and drop the Request Item Record from the Trigger Action. You can add some work notes like the ones shown below and set State field to Closed Complete.
Lastly click on Save and Activate in the upper right corner.
Complete Catalog Item
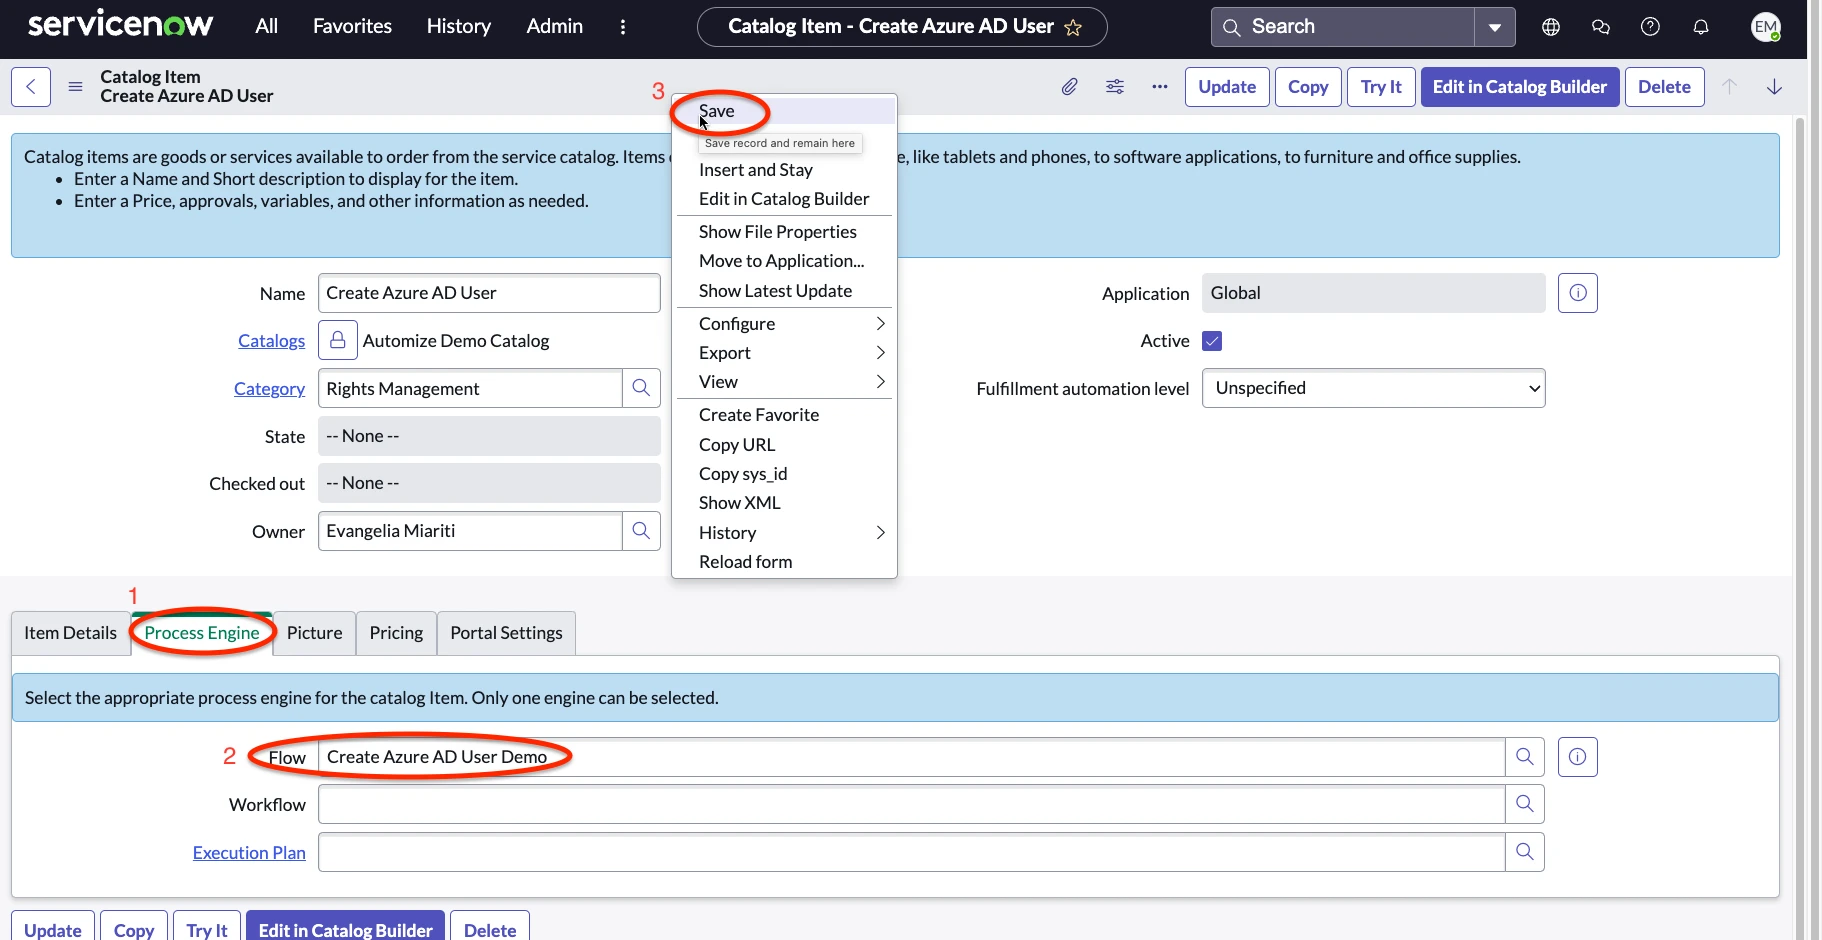
Navigate back to the catalog item we created in the previous step. In the Process Engine Tab select the Flow we created. Then right click on the grey bar of the form and select Save.
Click on Try it. Set a start date a first and last name and place the order.
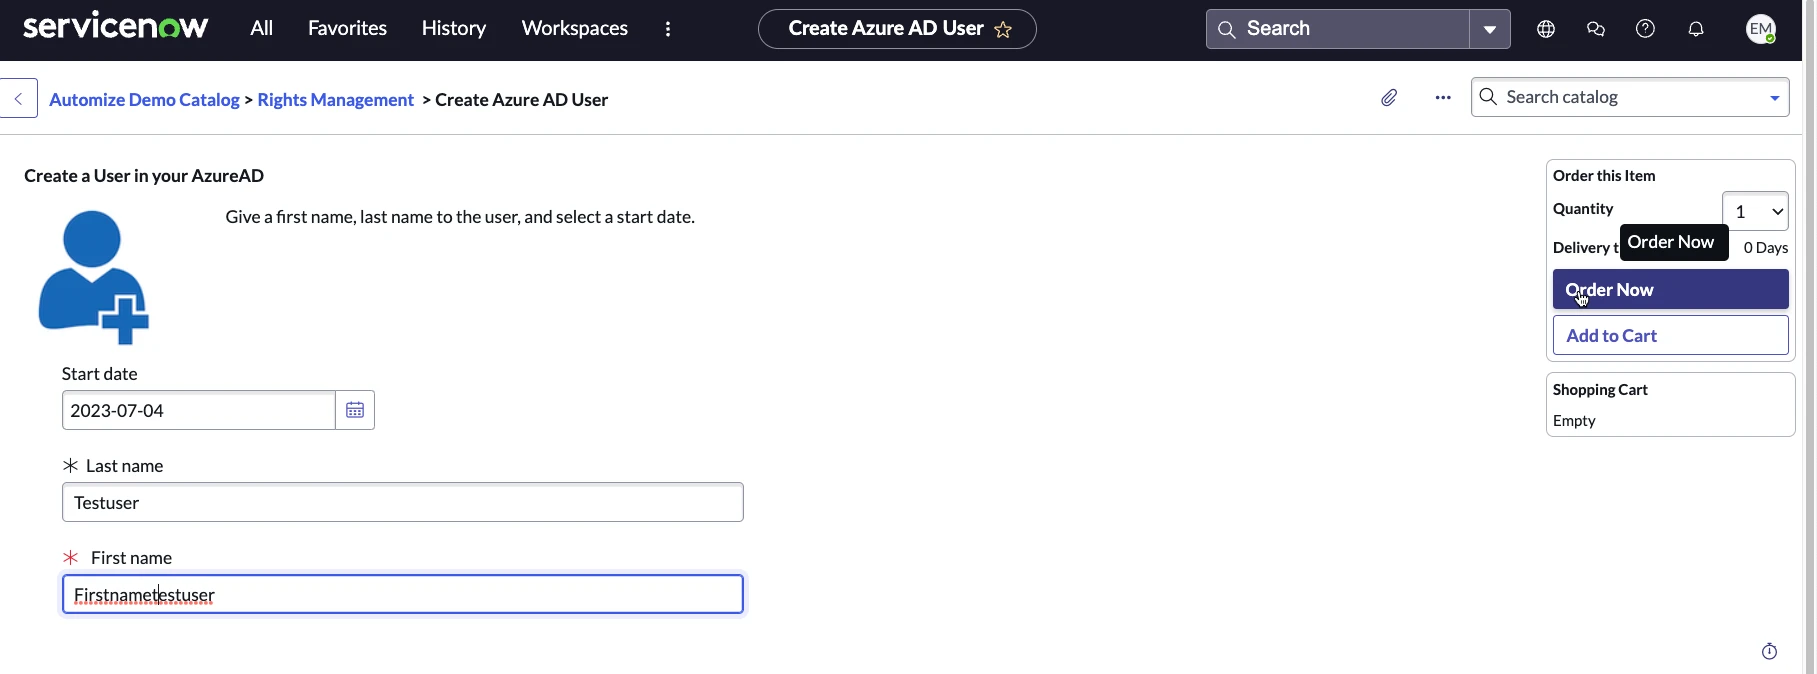
The result should look like the following: