Prerequisites to connect to Azure Active Directory
Create an application in Azure
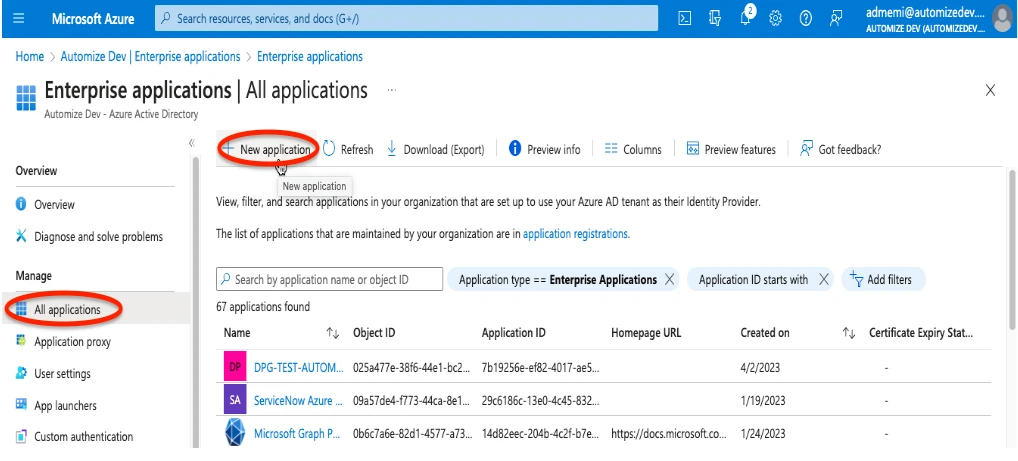
In order to be able to connect to your Azure Active Directory you need to create an application in Azure that uses Service Principal. To do so navigate to the Azure Portal, open the Azure Active Directory, and go to the Enterprise Applications section. In here make sure “All applications” is selected and click on “+ New Application”.
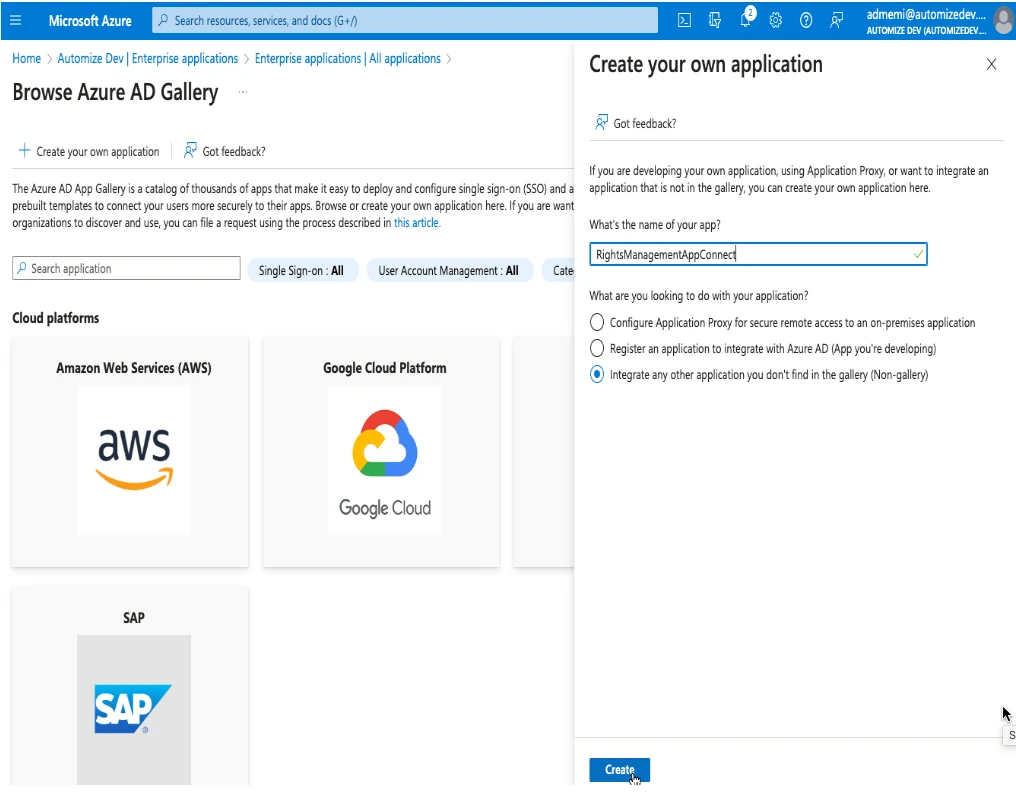
Then click on “+ Create your own application”. Give a name to the application and select “Integrate any other application you don’t find in the gallery” and click on “Create”.
So you have created an Enterprise Application within the Azure AD Portal and this can be referred to as a Service Principal.
Now navigate to the App Registration settings in Azure AD, make sure “All Applications” is selected and select the service principal we just created.
.webp)
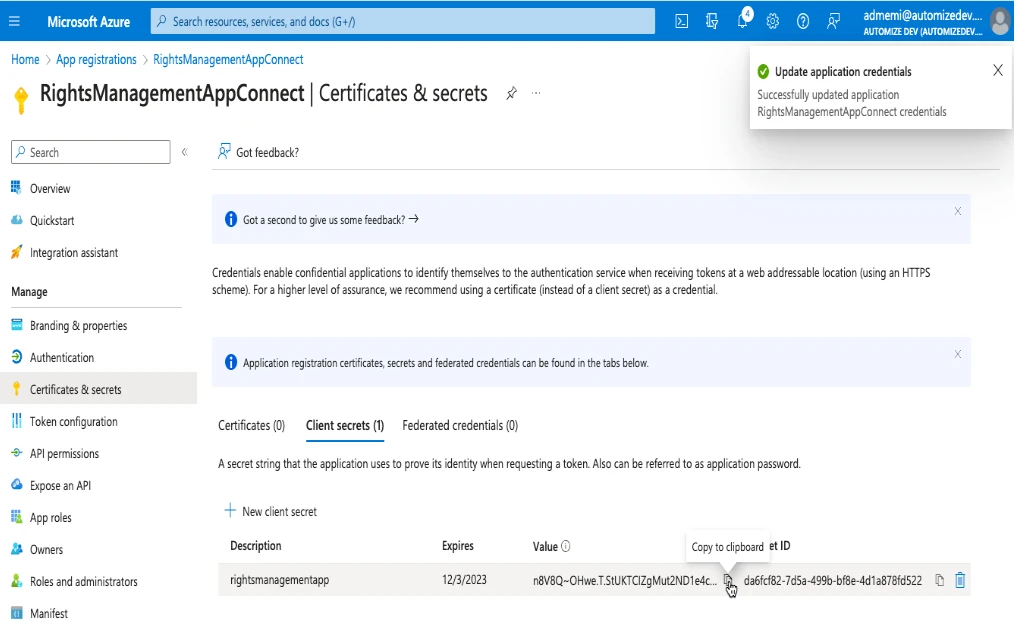
Connect with a Client Secret
From here go to the “Certificates & Secrets” section and click on “+New client secret”. Give a description and an Expiration date and click on Add. Once created copy the value of the secret because it will be the only time you will be able to see it.
Connect with a Certificate
The first step will be to generate a certificate. This can be done by using the PowerShell command shown below:
$mycert = New-SelfSignedCertificate -CertStoreLocation "cert:\CurrentUser\My" -Subject "CN=RightsManagementAppConnect" -KeySpec KeyExchange -NotBefore ((Get-Date).AddDays(-1)) -NotAfter ((Get-Date).AddYears(5))
Recommendation: Please change the common name (subject) to match the name of the service principal and configure the NotAfter time in the above PowerShell to match your requirements.
Confirm the certificate and copy the ThumbPrint.
$mycert | Select-Object -Property Thumbprint

Export certificate to .cer file.

$mycert | Export-Certificate -FilePath ("C:\temp\RightsManagementAppConnect.cer")
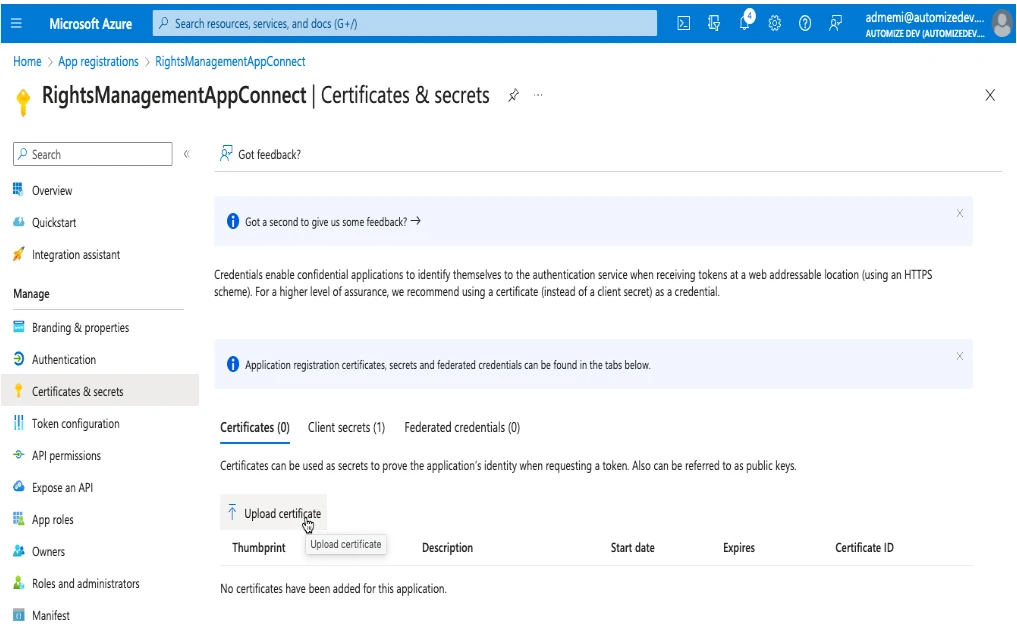
It’s time to upload the self-signed certificate to the application. Click on Certificates & secrets. Click Certificates > Upload certificate. Find the certificate and click on Add.
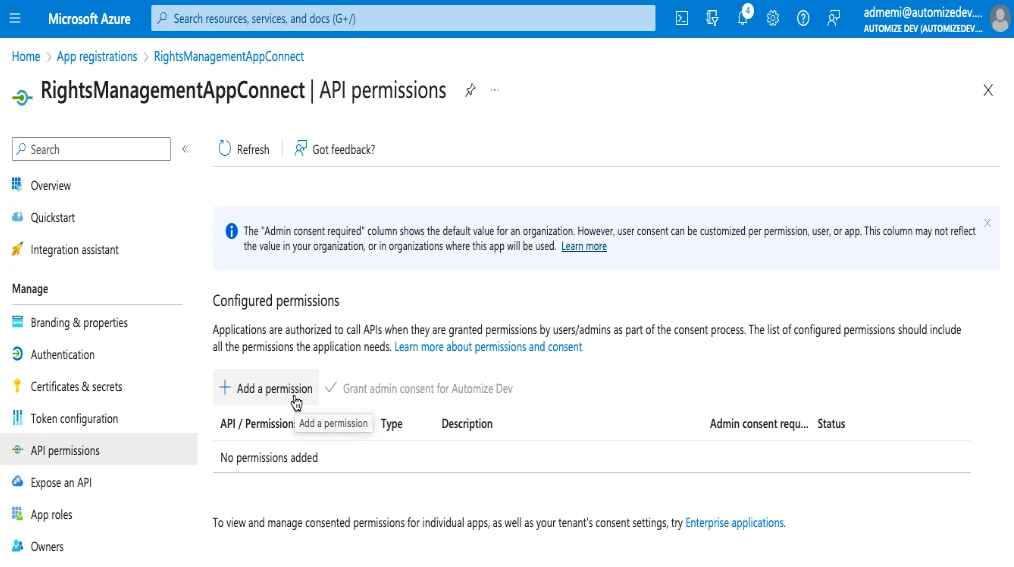
Give permissions to the application
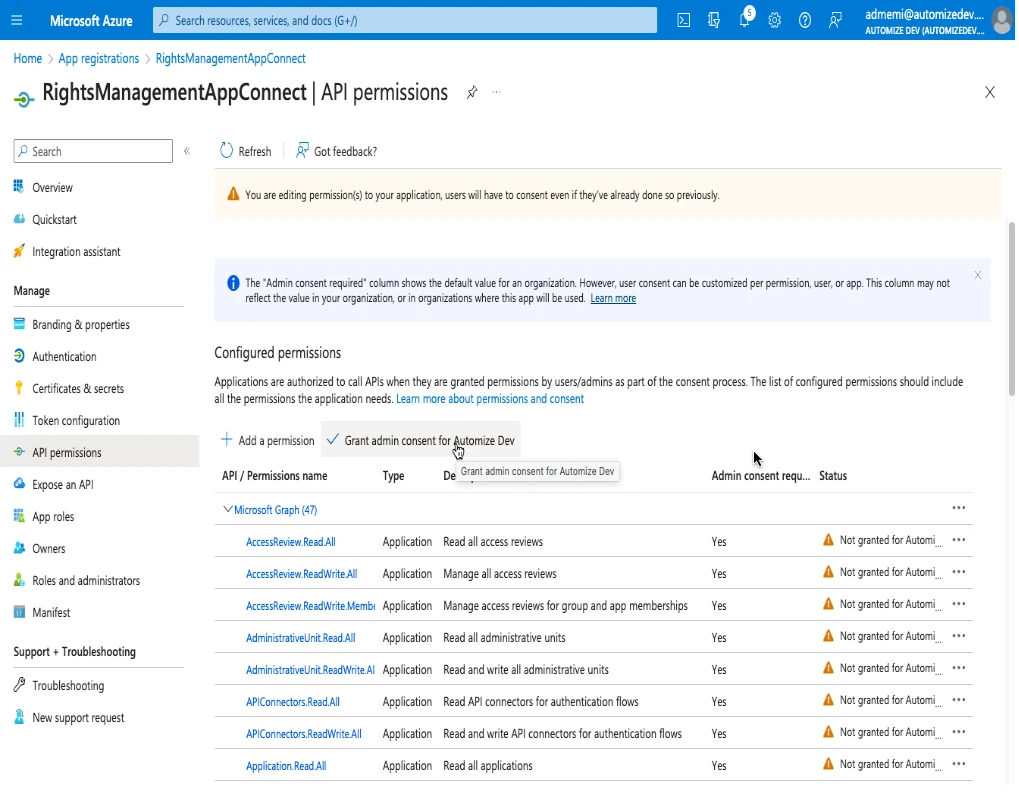
Navigate to the application and choose “API Permissions” on the left side menu and click on “Add a permission”.
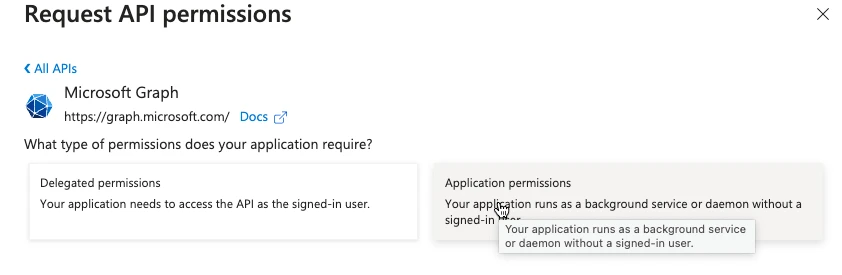
Then choose “Microsoft Graph” and “Application Permissions”.
The following permissions should be chosen:
AccessReview:
- AccessReview.Read.All
- AccessReview.ReadWrite.All
- AccessReview.ReadWrite.Membership
AdministrativeUnit
- AdministrativeUnit.Read.All
- AdministrativeUnit.ReadWrite.All
APIConnectors
- APIConnectors.Read.All
- APIConnectors.ReadWrite.All
Application
- Application.Read.All
- Application.ReadWrite.All
- Application.ReadWrite.OwnedBy
AppRoleAssignment
- AppRoleAssignment.ReadWrite.All
Directory
- Directory.Read.All
- Directory.ReadWrite.All
- Directory.Write.Restricted
Domain
- Domain.Read.All
- Domain.ReadWrite.All
EntitlementManagement
- EntitlementManagement.Read.All
- EntitlementManagement.ReadWrite.All
Group
- Group.Create
- Group.Read.All
- Group.ReadWrite.All
GroupMember
- GroupMemberr.Read.All
- GroupMemberr.ReadWrite.All
- Mail.Read
- Mail.ReadBasic
- Mail.ReadBasic.All
- Mail.ReadWrite
- Mail.Send
RoleAssignmentSchedule
- RoleAssignmentSchedule.Read.Directory
- RoleAssignmentSchedule.ReadWrite.Directory
RoleManagementAlert
- RoleManagementAlert.Read.Directory
- RoleManagementAlert.ReadWrite.Directory
RoleManagement
- RoleManagement.Read.All
- RoleManagement.Read.CloudPC
- RoleManagement.Read.Directory
- RoleManagement.Read.Exchange
- RoleManagement.ReadWrite.CloudPC
- RoleManagement.ReadWrite.Directory
- RoleManagement.ReadWrite.Exchange
UserAuthenticationMethod
- UserAuthenticationMethod.Read.All
- UserAuthenticationMethod.ReadWrite.All
User
- User.EnableDisableAccount.All
- User.Export.All
- User.Invite.All
- User.ManageIdentities.All
- User.Read.All
- User.ReadWrite.All
Then click add permissions and Grand admin consent for …
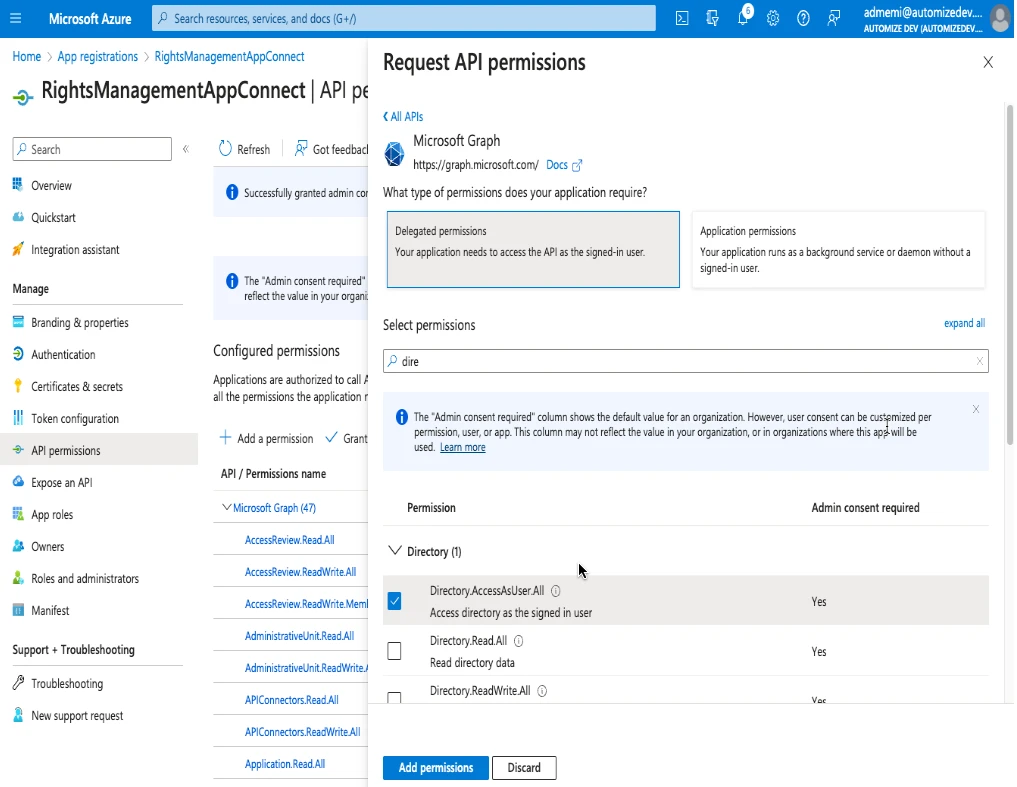
Then click add permissions, choose Microsoft Graph then delegated permissions and :
Directory
- Directory.AccessAsUser.All
Then click again add permissions choose APIs my organisation uses and select :
Office 365 Exchange Online.
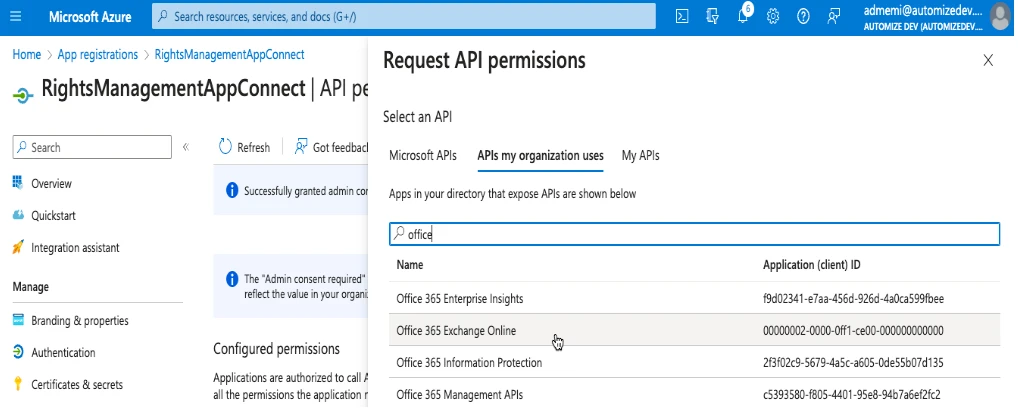
Then select application permissions and Exchange.ManageAsApp
Click on add permissions and then Grand admin consent for …
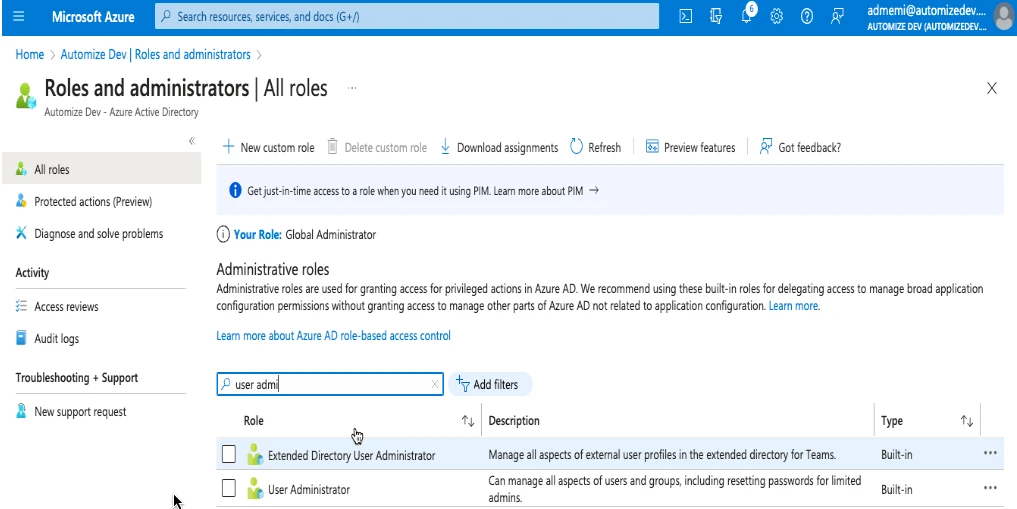
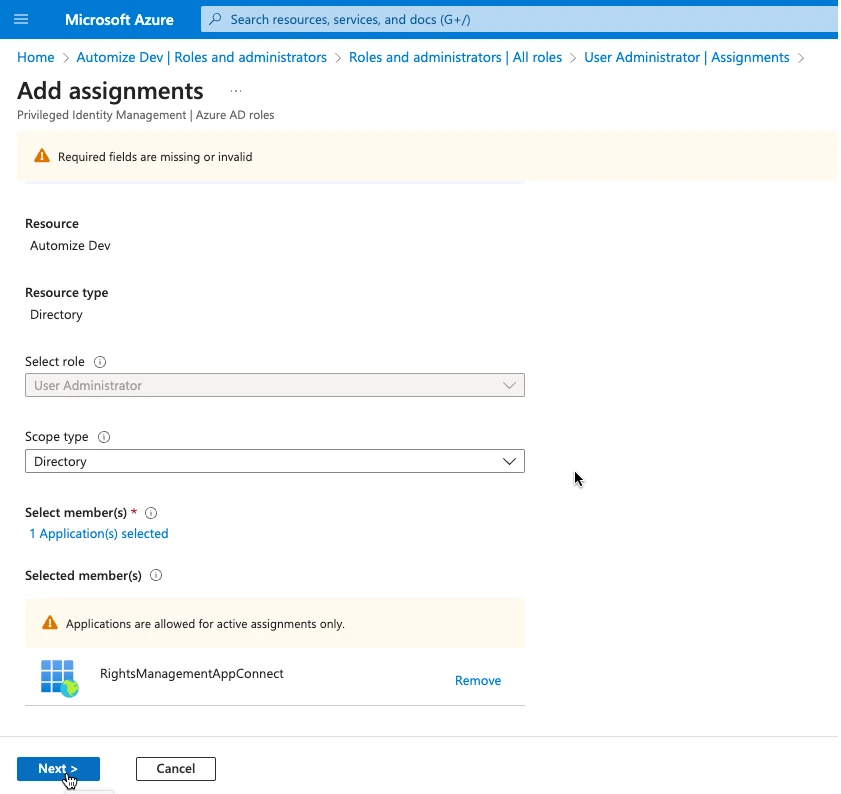
Then navigate to Azure Active Directory and Roles and Administrators give role “user administrator” to the app and “exchange administrator”.