ServiceNow Setup
In this guide we will configure Rights Management App in ServiceNow to be able to connect to your Active Directory and Azure Active Directory. To complete this guide you must have the role of Admin in ServiceNow, and Automation App should be already installed and set up in your environment. Here is the guide to setup the Automation App.
Create ServiceNow Credentials
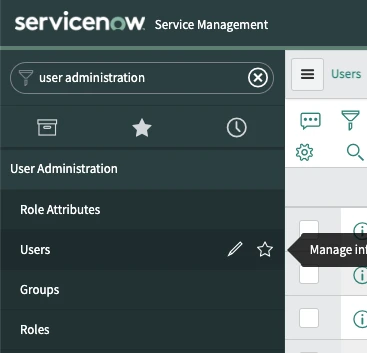
Navigate to the Users List under User Administration into ServiceNow and create a new user.
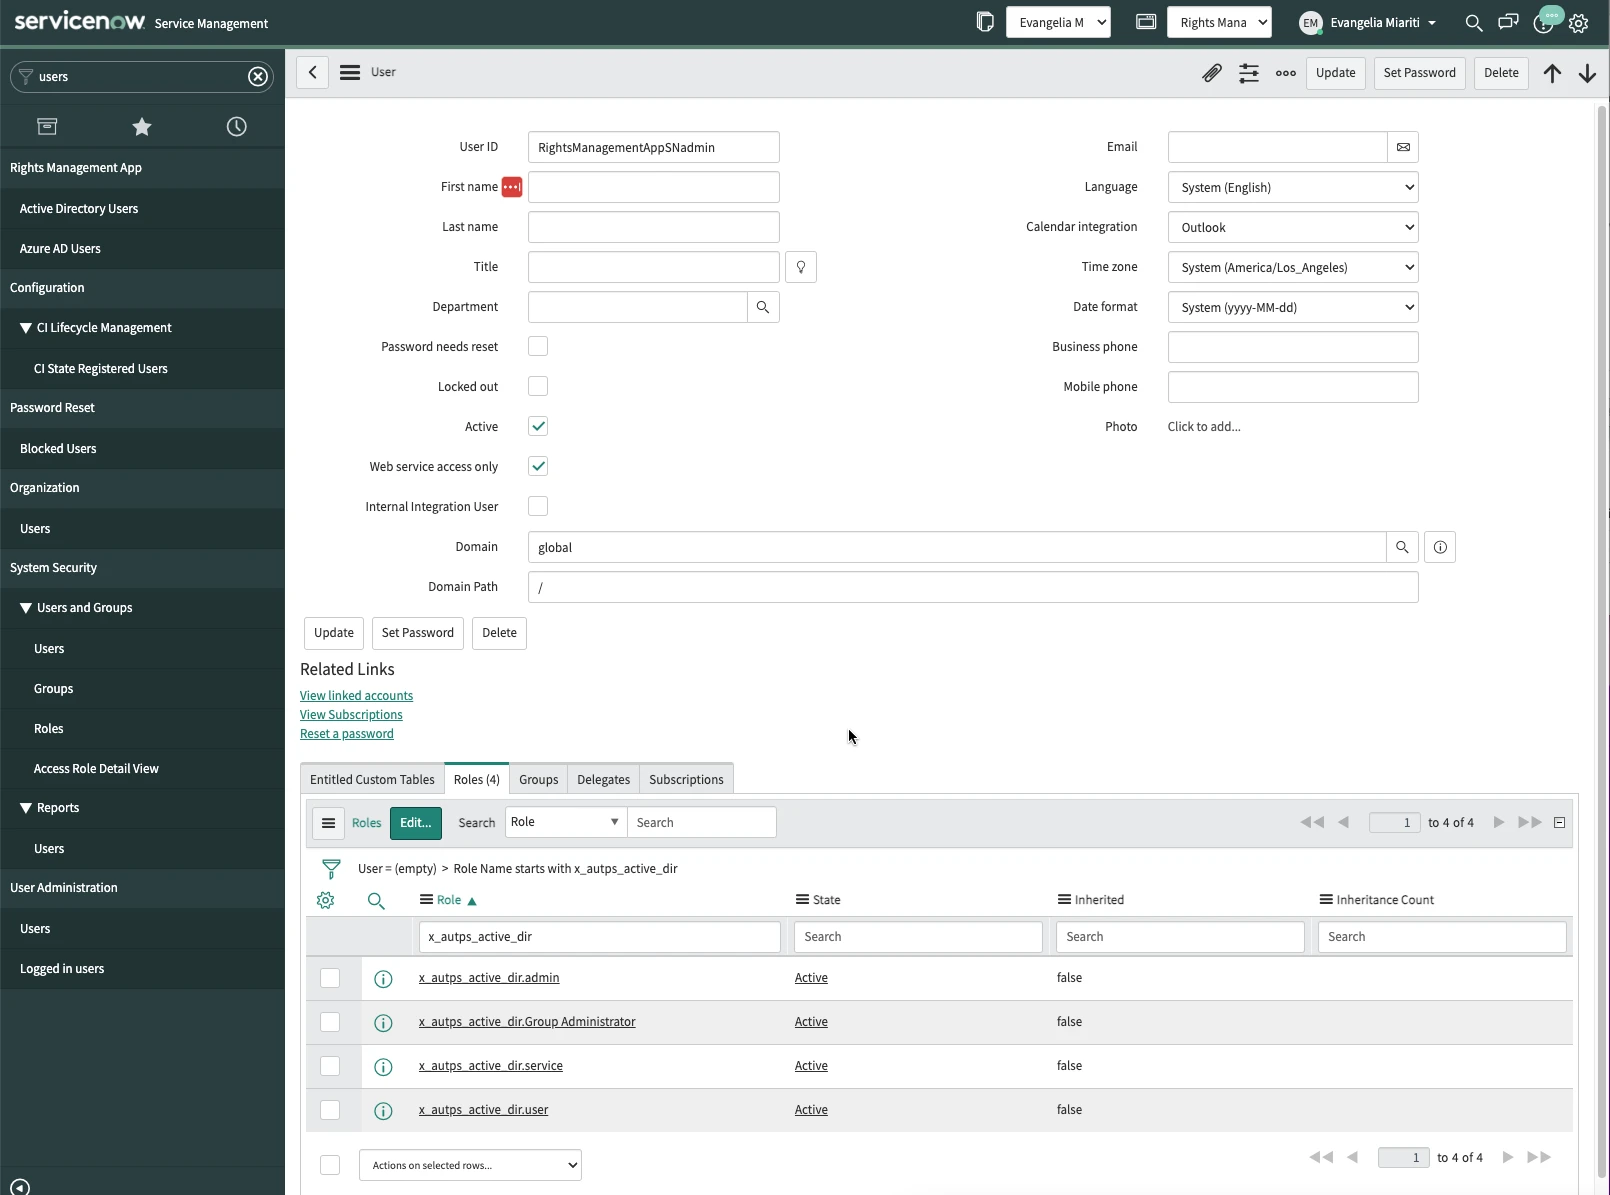
Give a username to the user which you should copy and store it because you will need it in a next step. Set the Web Service access only field to true. Give to the user the “x_autps_active_dir.user”,“x_autps_active_dir.admin” and “x_autps_active_dir.service” roles. Then click on Submit.
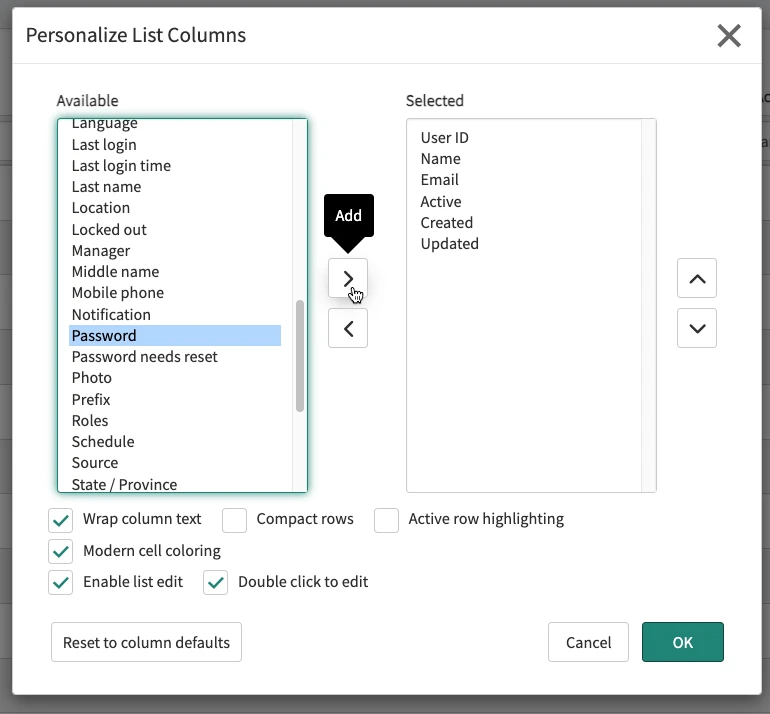
You will be redirected back to the User list. Now you need to give a password to the user. To be able to do that that click on the gear icon and select the Password field from the Available list and add it to the Selected list. Then click on OK.

Then double click on the password field of the user and change the password, copy the password and store it because you will need it on a next step, and laslty click on the green save button next to the password.

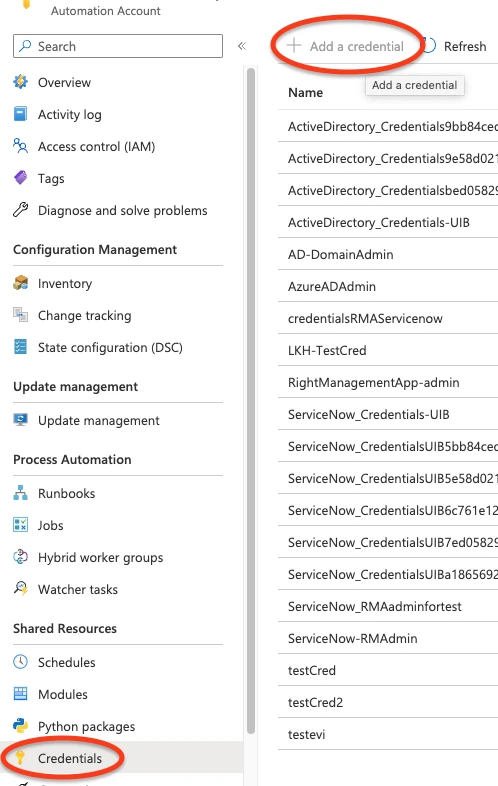
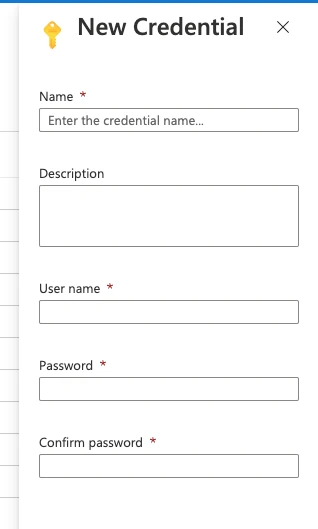
Then go to your Azure Automation Account click on “Credentials” on the left-side menu and “Add a credential”.
Set the Name and username to be the one you copied and stored and set the password to be the password you copied and stored.
Create a Tenant in ServiceNow
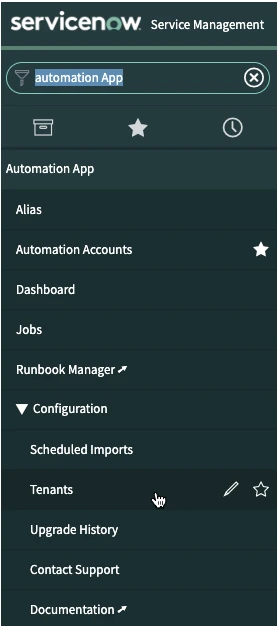
Open the Automation App in the Navigator of ServiceNow. Click on Tenants and then click on the New icon at the top left of the list.
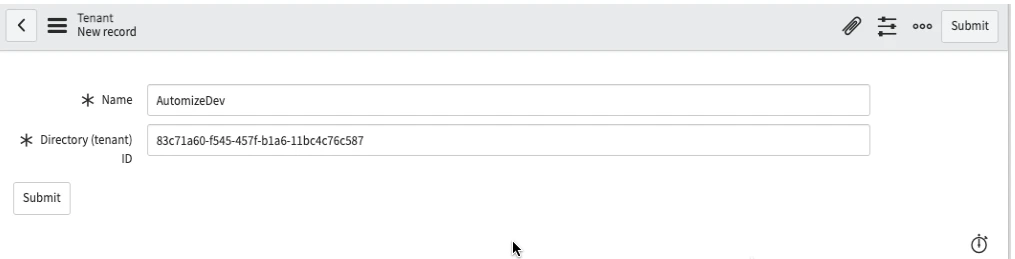
Give a name to the Tenant and set the Directory (tenant) ID to be the Directory (tenant) ID value copied in the previous step. Right-click on the gray header and click on Save.
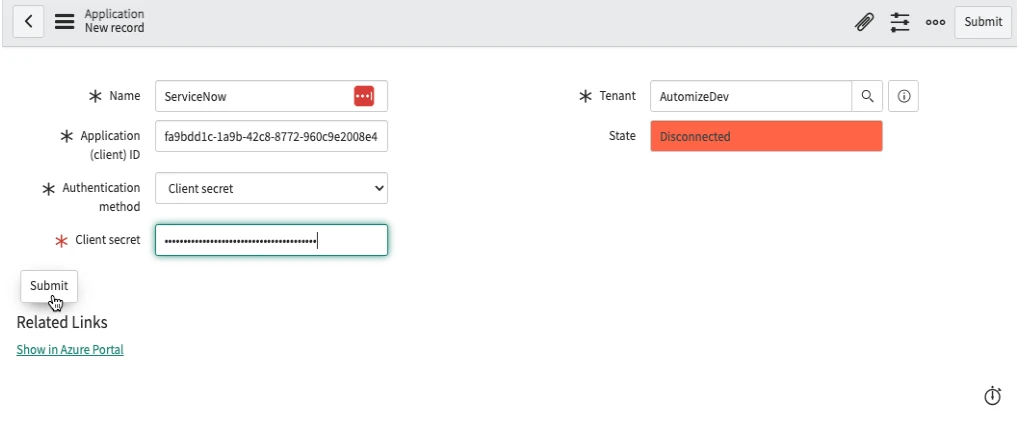
Then scroll down to the bottom of the form: There you should see an “Applications” related list. Click on the New button.
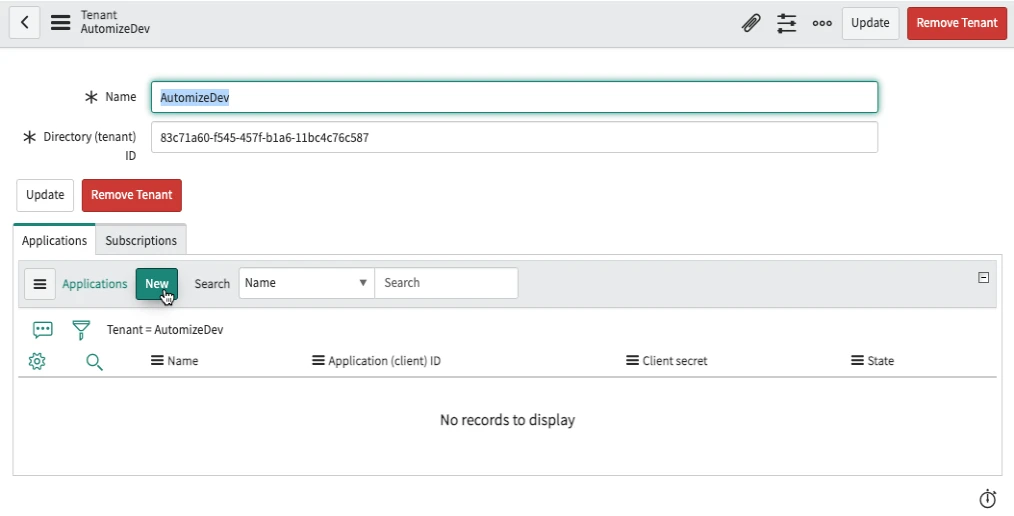
Give a Name to the application. Set the Application ID value to be equal to the Application ID you copied from your Application registration in the previous step. Set the Client secret to be equal to the value of the client secret you copied in the previous step. Lastly, right-click on the grey header and click on “Save”.
Once you clicked on “Save” you should be able to see a “Scheduled Imports” related list.
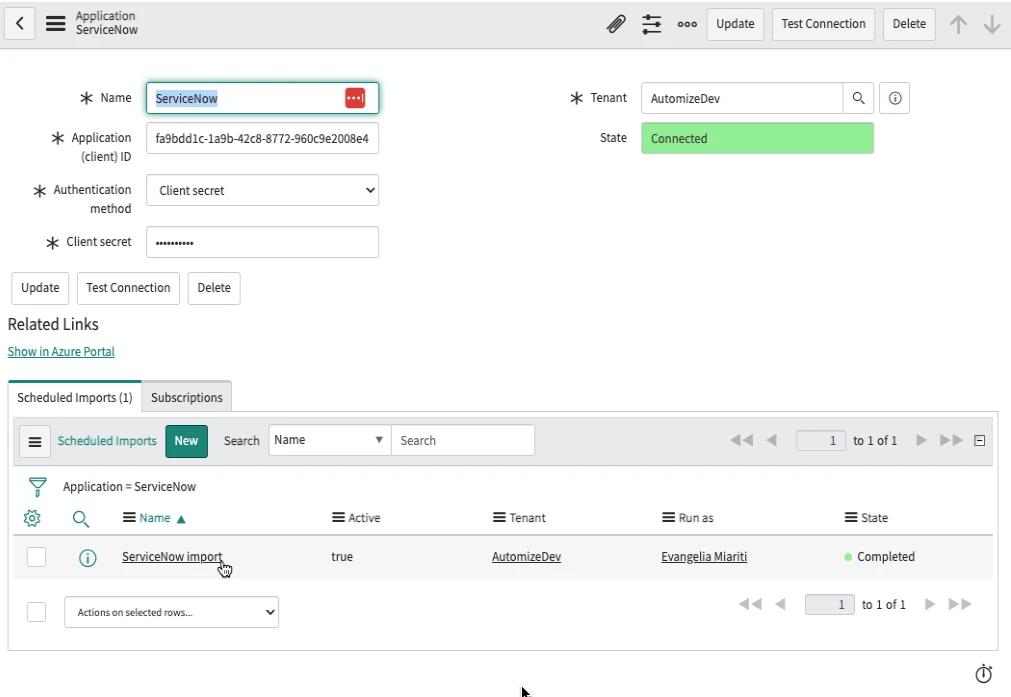
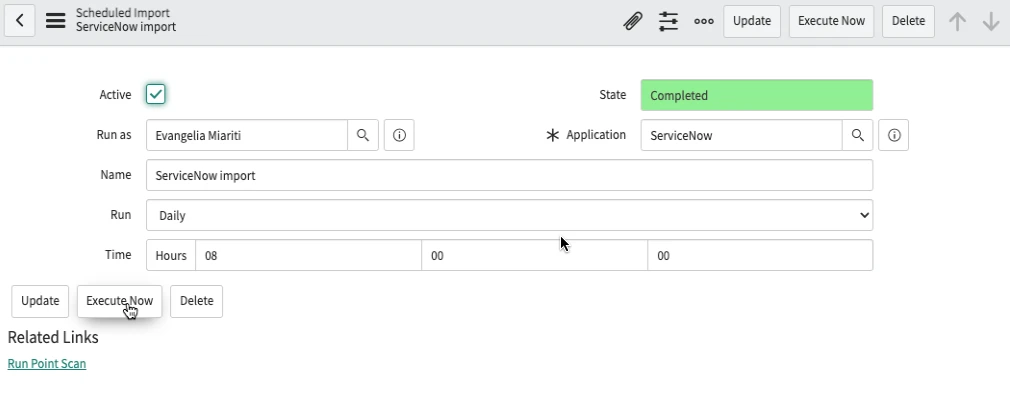
Click on the scheduled import record for your application and then click on “Execute Now”.
After this step you should be able to see your Automation Account in the Automation Accounts list of the Automation App.