ServiceNow Setup
Rights Management App give you the possibility to collect all the accounts a user has in your organization. This collection can be created automatically if enough information are given or you can add the accounts manually to an Identity. In this tutorial you will learn how to create an Identity and how to link this Identity to user accounts.
Create Identities
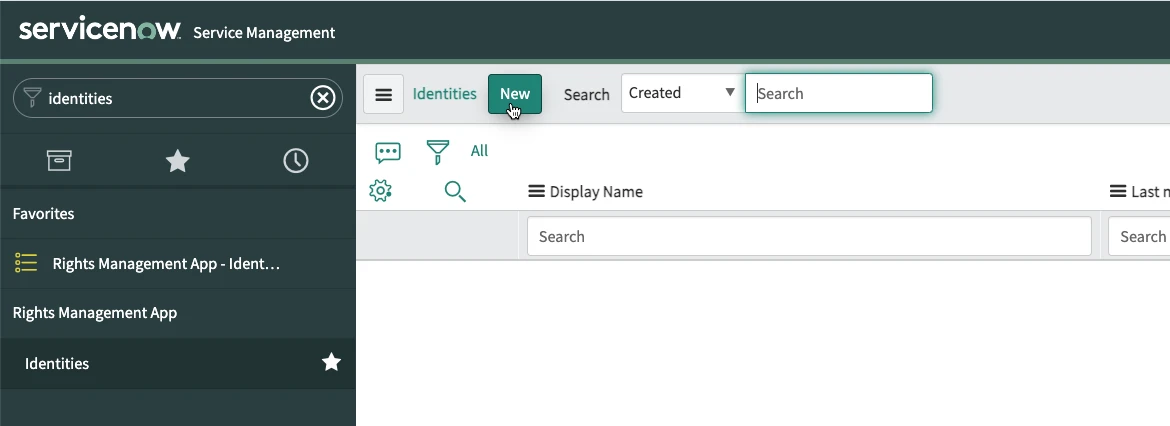
First step of the process is to navigate to the Rights Management App > Identities list and create a new one.
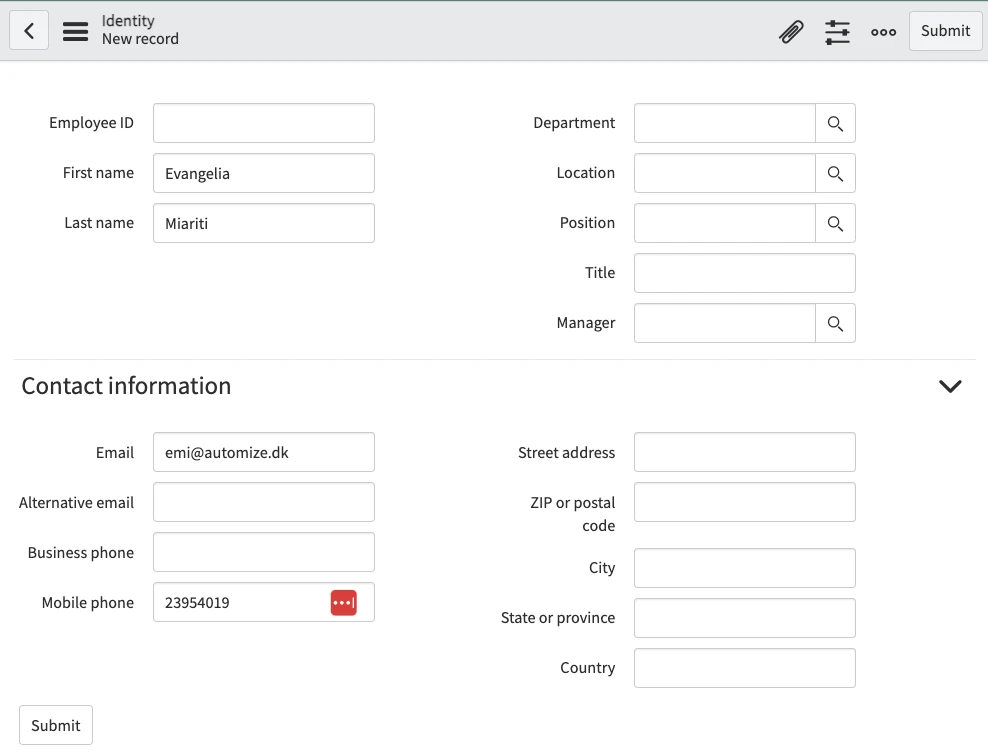
You can give a first name and a last name to the user to begin with. Then in the Contact Information section you need to add the email and the phone number of the user. These two values are the ones used to find accounts related to the Identity.
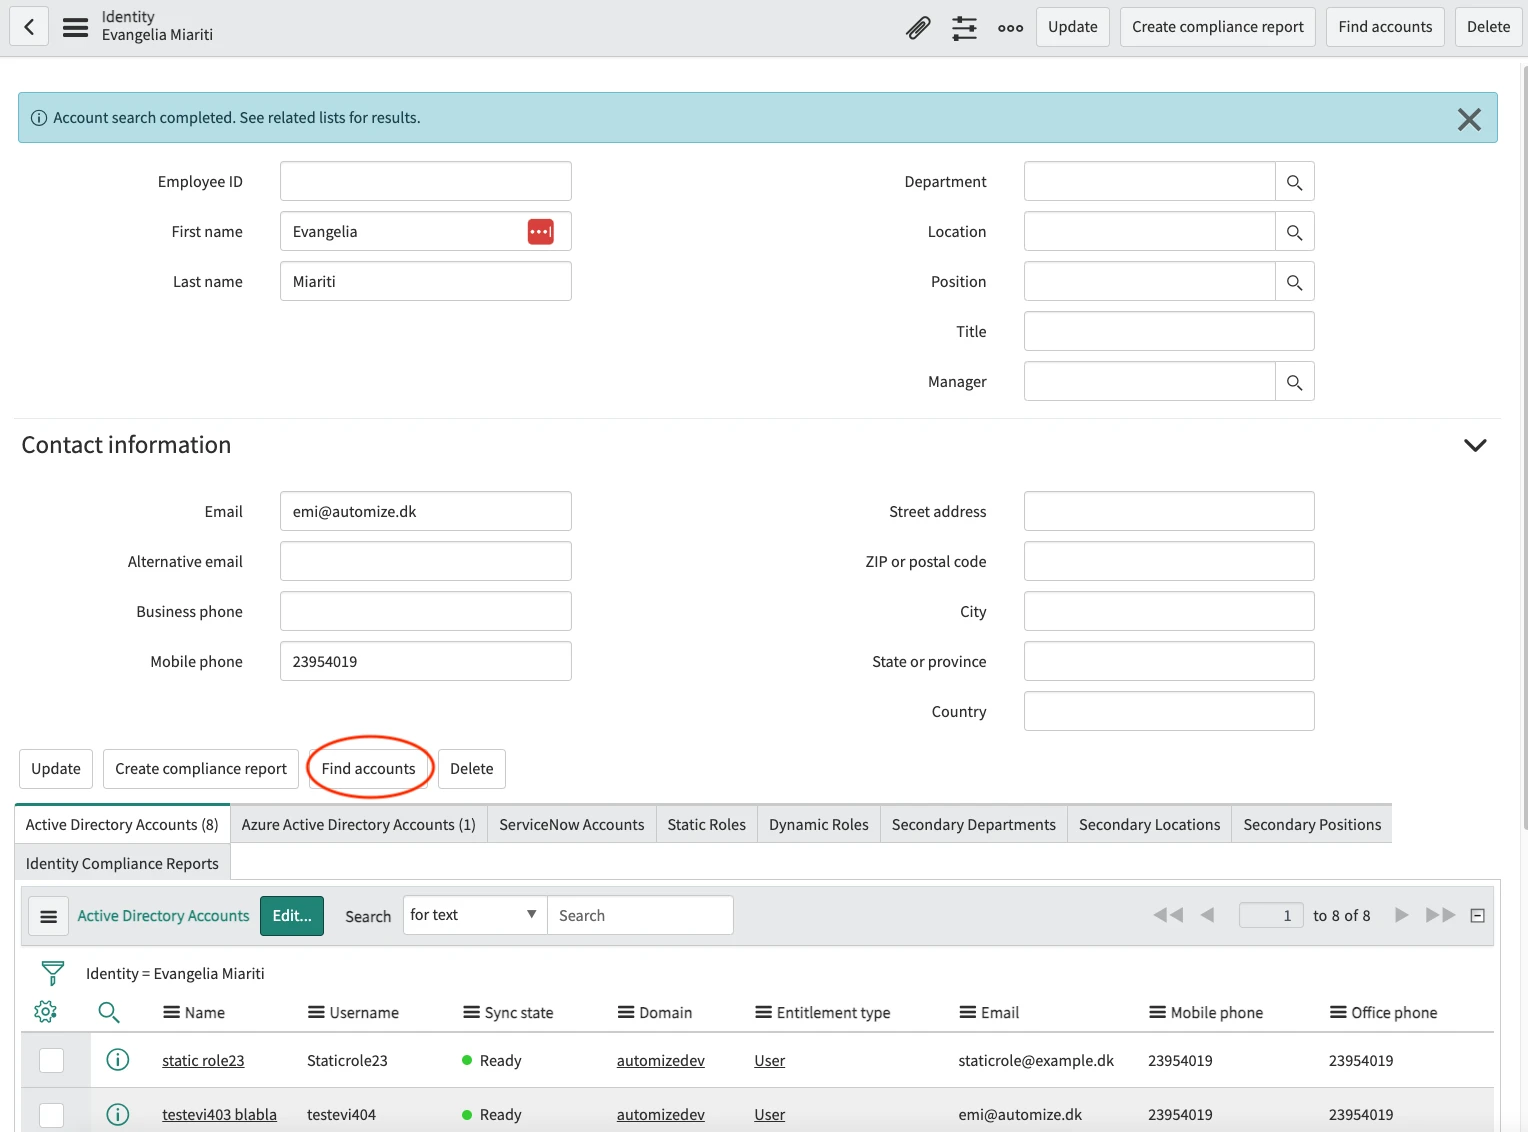
Then right click on the upper gray bar and select Save. Once the Identity is saved scroll down and click on the Find accounts button. After some seconds accounts in the Active Directory, Azure Active Directory and ServiceNow will be linked to the identity based on the email and phone number.
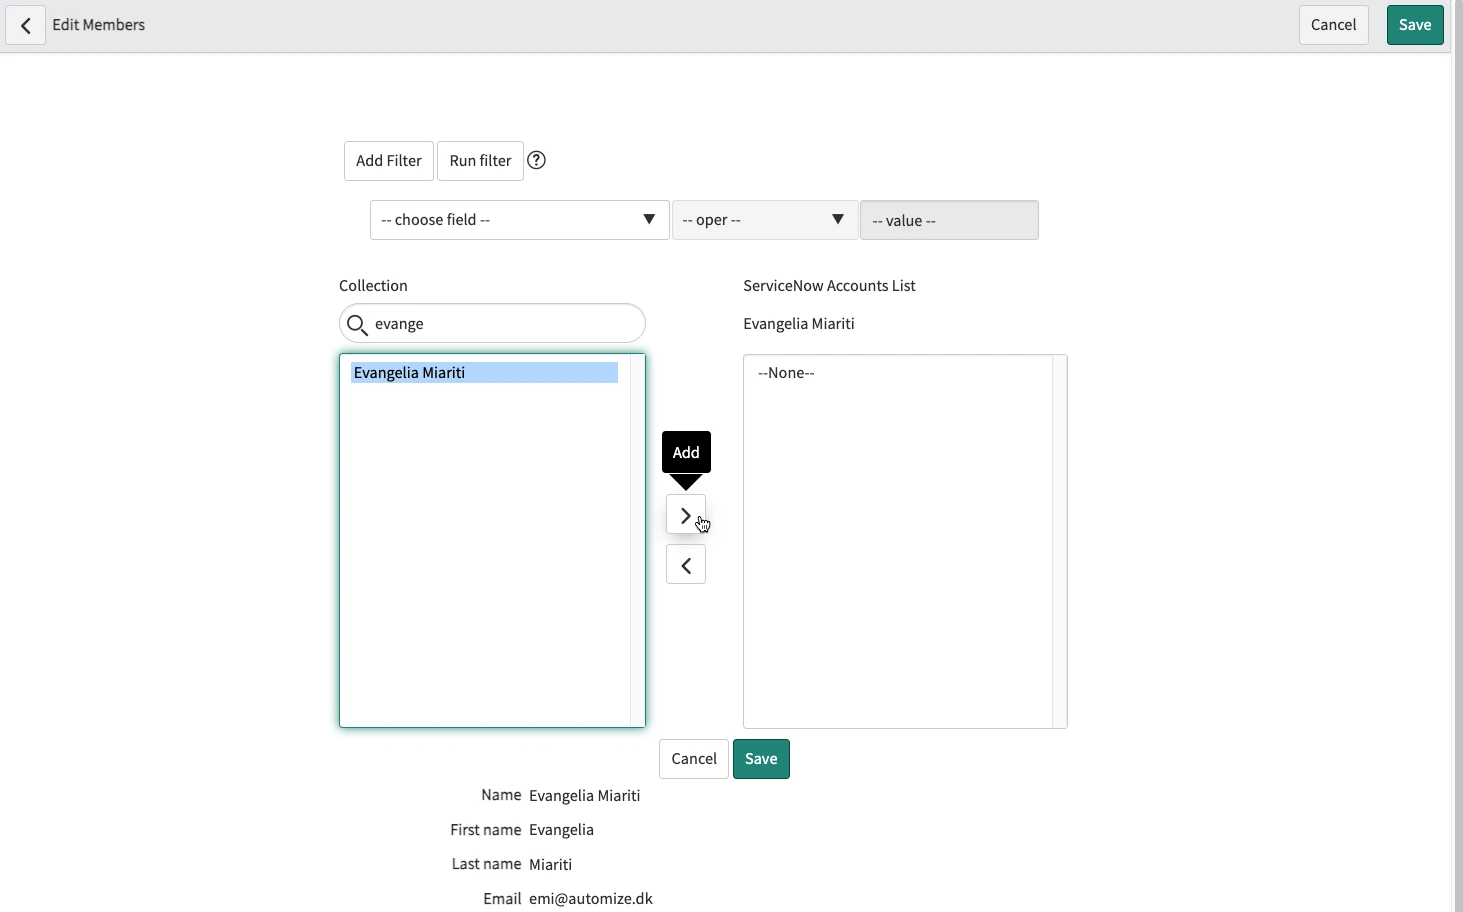
If there are more accounts that belong to the user but were not linked to the identity you can add them manually by selecting the releted list in which the account belongs to (in this example we select ServiceNow because we want to link a ServiceNow account to this Identity) and click on Edit….
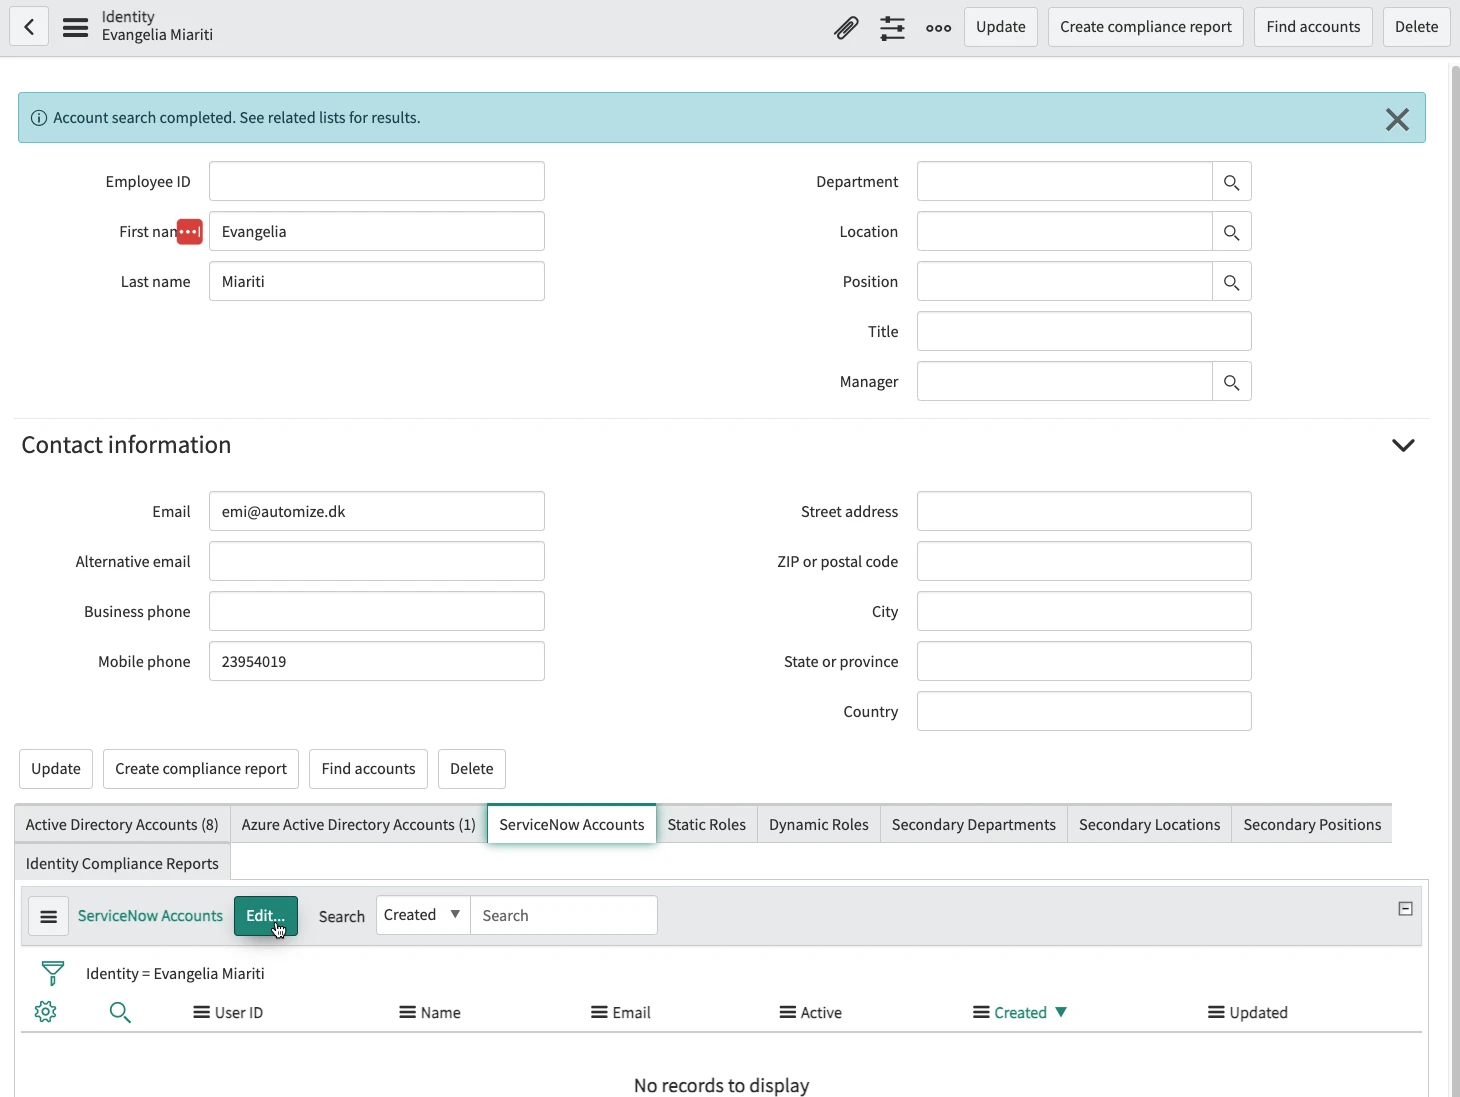
Then from the Collection list select the user account you want to add to the identity and drop it the the Accounts List on the right side. Then click on Save.